Diseases General Health Skin Conditions

Archive for March, 2017

Hypersomnolence

Mar 12 2017 Published by under General Health

Definition

Hypersomnolence is a medical condition in which the patient is excessively sleepy during the day and sleeps prolonged hours in the night. Patients diagnosed with hypersomnolence or hypersomnia as it is also known, do not feel tired when they wake up in the morning. However, they may feel the increased need to nap during the day, regardless of the moment in the day, their actual location (work) or their current activity (eating, talking). These naps do not bring the necessary relief from the symptoms commonly associated with hypersomnolence.

According to the medical literature, hypersomnolence is one of the most frequent sleeping disorders encountered in various populations. As opposed to persons who are extremely tired, the patients diagnosed with hypersomnia can fall asleep without actually wanting for that to happen. Often times, this problem is solved by identifying the underlying condition that has led to it in the first place. However, it is important for the patient to maintain a regular sleeping schedule during the night, with at least seven or eight hours of sleep.

It seems that 5% of the general population is affected by this medical condition, hypersomnia being more often encountered in men than in women. This is because the majority of the people diagnosed with sleeping apnea are men. The diagnosis of hypersomnolence can be made with the help of special-made scales, such as the Epworth Sleepiness Scale or the Stanford Sleepiness scale. Following the application of these scales, the patient will have to undergo more complex investigations, to determine the underlying causes of the hypersomnia.

Hypersomnolence Symptoms

These are the most common symptoms of hypersomnolence:

  • Excessive sleepiness during the day
  • Prolonged sleeping during the night
  • Inappropriate napping times
  • Involuntary napping
  • Difficulty waking up after a long sleep and getting out of bed
  • Disorientation
  • Anxiety
  • Irritation
  • Lethargy
  • Agitation
  • Thinking and speech are affected by the excessive state of drowsiness
  • Appetite loss
  • Hallucinations
  • Cognitive skills and memory are impaired

Possible Causes of Hypersomnolence

These are the most common causes that lead to the appearance of hypersomnolence:

  • Genetic predisposition
  • Idiopathic cause (unknown cause)
  • Mental disorders, anxiety and bipolar disorders
  • Cancer – paraneoplastic syndromes
  • Head trauma
  • Central nervous system injury, disorder or dysfunction (thalamus, hypothalamus, brain stem)
    • Encephalitis
    • Epilepsy
    • Hydrocephalus (early stage)
  • Multiple sclerosis
  • Depression (severe cases especially)
  • Obesity
  • Sleep apnea syndrome
    • Variant – upper airway resistance syndrome
  • Narcolepsy
  • Medication (hypersomnolence is a side-effect)
  • Nocturnal myoclonus – this occurs during sleeping and it involves the constant moving of the legs.
  • Restless leg syndrome
  • Post-traumatic disorder
  • Kleine-Levin syndrome – this is a rare sleeping disorder in which the patient suffers from episodes of hypersomnolence, cognitive and mood changes.
  • Idiopathic recurrent stupor – this is rare condition, without a clear cause, in which the patient suffers from recurrent states of stupor.
  • Infections (hypersomnolence appears as a post-infection consequence, when the body is weakened from the infection and needs to recover)
  • Hypersomnolence can also be associated with the following medical disorders: Prader-Willi syndrome, Norrie disease, Niemann-Pick disease, myotonic dystrophy.
  • Neurological disorders that mimic hypersomnolence
  • Neurodegenerative disorders: Alzheimer’s disease, Parkinson’s disease, multiple system atrophy
  • Drug or alcohol abuse
  • Neuromuscular diseases and diseases of the spinal cord
  • Chronic sleep deprivation
  • Other causes include: diabetes, hepatic encephalopathy, acromegaly, chronic fatigue syndrome, fibromyalgia, chronic kidney disease, autoimmune disorders (lupus, rheumatoid arthritis, Morvan’s syndrome), celiac disease, hypothyroidism, iron deficiency (anemia), viral infections (Whipple’s disease, mononucleosis, HIV, Guillain-Barre syndrome)

Treatment

The treatment of the hypersomnolence depends on the existence of an underlying condition and the symptoms presented by the patient. These are the most common causes of treatment undertaken for hypersomnia:

Medication

Medication with stimulation properties: amphetamine, methylphenidate, modafinil, sodium oxybate, metamphetamine, dextroamphetamine, methylphenidate,selegiline. These drugs are recommended in order to prevent the need of sleeping during daytime and also in cases in which the hypersomnolence is associated with narcolepsy.

Modafinil is one of the most used medications given to patients diagnosed with hypersomnolence. Its effects are as follows:

  • Enhances wakefulness and day-time alertness
  • Reduced side-effects compared to other medication
  • Long acting effect (half-life 12-15 hours)
  • Direct effect on the anterior hypothalamus
  • Dopamine-releasing action
  • Small abuse/tolerance potential

Other medication:

  • Clonidine – sympatholytic medication commonly used to treat high blood pressure
  • Levodopa – treatment commonly recommended in case of Parkinson’s disease
  • Bromocriptine – dopamine agonist indicated in the treatment of pituitary tumors, Parkinson’s disease and type two diabetes
  • Amantadine – recommended as treatment for Parkinson’s disease and also for respiratory viral infections
  • Methysergide – formerly used for the treatment of chronic headaches and migraines
  • Tricyclic anti-depressants
  • Monoamine oxidase inhibitors – recommended for the treatment of atypical depression and also for Parkinson’s disease

Behavioral therapy

Patients are encouraged to avoid working during the night and also to refrain from being excessively active right before going to sleep. Other changes refer to:

  • Establishing a regular sleeping schedule (waking up and going to bed at the same time every day)
  • Avoiding sleep deprivation (during the night)
  • Scheduling the naps to be taken during the day
  • Sleeping before activities that require intense mental effort
  • Avoiding driving and other occupations that require intense concentration
  • Doing at least half an hour of physical exercise every day
  • Patients are encouraged to join hypersomnolence support groups

Diet changes

Patients are recommended to avoid excessive alcohol drinking and also to exclude coffee and other caffeine-based drinks from their diet. Smoking is also prohibited as it can lead to additional circulatory problems.

Also, Sleep hygiene techniques can be taught in a specialized sleep clinic.

As you can see, the treatment of hypersomnolence addresses the underlying medical condition but it also involves certain changes on the daily habits of the patient. Behavioral therapy can lead to an improve sleep hygiene and it can reduce the frequency or severity of the hypersomnia episodes. It is important for the patient to be consistent with these changes and stick to a healthy diet, based on fresh fruits and vegetables. Also, drinking plenty of water is essential, so as to keep the body properly hydrated.

No responses yet

Excessive Yawning

Mar 11 2017 Published by under General Health

What is Excessive Yawning?

Yawning is a reflex or involuntary process in which we open our mouths in order to take a deep breath of air. This reflex and deep inhalation of air seems to be a direct consequence of low levels of oxygen in the body. However, this does not fully explain why we yawn when we are bored, tired or drowsy. Some people yawn when traveling in a plane in order to alleviate the pressure they feel in their eardrums.

Interestingly enough, even though a person is paralyzed, the capacity to yawn is not affected. And what is even more interesting is that even fetuses yawn. However, in some situations, this reflex reaction can occur excessively. We call it excessive yawning when the process occurs in close repetitive sessions, somewhere around one to four yawns per minute. It is important to determine whether there is an underlying condition leading to the excessive yawning, as each yawn creates a tremendous pressure on the lungs.

Causes of Excessive Yawning

excessive yawningThese are the most common causes of excessive yawning:

  • State of drowsiness or weariness
  • Burnout syndrome, characterized by extreme fatigue, lack of energy and lethargy
  • Disorders in which the day-night cycle is affected (time zone changes included), being primarily characterized by sleepiness during the day or cases of insomnia
  • Sleep apnea
  • Chronic venous insufficiency (the blood flow through the veins is insufficient)
  • Cardiovascular disease
  • Vasovagal reaction:
    • Heart attack
    • Aortic dissection
  • Brain tumor and other disorders of the central nervous system
    • Epilepsy
    • Encephalitis
    • Progressive supranuclear palsy
  • Cerebrovascular stroke
  • Multiple sclerosis
  • Medication (rare occasions) – antidepressants, anti-anxiety medication, anti-allergy medication (antihistamines), medication for Parkinson’s disease
    • Particular case – opiate withdrawal
  • Disorders in which the body’s temperature is affected (rare cases)
  • Excessive weight
  • Physiological reaction to change of daily schedule (especially in those who work during the night or work for prolonged periods of time)
  • Hypothyroidism or electrolyte imbalance – both of these two medical conditions lead to drowsiness immediately after waking, which in turn can lead to excessive yawning
  • Hashimoto’s thyroiditis – this is an autoimmune disease in which the thyroid hormones are at low levels as well.
  • Excessive emotions, stress or anxiety
  • Depression
  • Respiratory disease:
    • COPD (chronic obstructive pulmonary disease)
    • Emphysema
    • Chronic bronchitis

Treatment

Yawning excessively can be a sign that you are just overly tired but, at the same time, it can be a symptom of an underlying medical condition. Treating that underlying pathology will also lead to the disappearance of the associated symptoms, including the excessive yawning.

Some studies have suggested that excessive yawning could be improved through yoga, physical exercise and meditation. However, these studies have not been yet applied to the general population and none of these activities will lead to the actual curing of the underlying condition.

If the excessive yawning is caused by a sleeping disorder, then you can always pay a visit to a professional sleeping clinic. Here, your sleeping patterns will be analyzed and the exact cause of the excessive yawning will be identified and then properly treated. Sleeping clinics are recommended for those who frequently change time zones, who suffer from insomnia or apnea during sleeping.

For those diagnosed with depression, severe anxiety or other similar problem, the solution is not to search a treatment for the excessive yawning. As with the other causes, one needs to address the root of the problem. In such situations, it might be a good idea to visit a therapist and start some counseling sessions. If your emotional state improves, then you will definitely stop yawning excessively as well.

Excessive working, without the proper rest, can lead to a wide range of upsetting symptoms, including excessive yawning. If you have the suspicion that you are suffering from the burnout syndrome, then be sure to make some lifestyle changes. Start sleeping at least seven or eight hours per night, eat fresh fruits and vegetables and keep regular meals. Drink plenty of water, rest and find a way to blend relaxation with work. As soon as you will leave the burned out state, you will stop yawning excessively.

As you can see, there is no wonder drug that will help you to stop yawning so frequently. Treat the underlying condition and you will forget about yawning shortly after that.

No responses yet

Allergic Conjunctivitis

Mar 10 2017 Published by under Eye Health

What is Allergic Conjunctivitis?

Allergic conjunctivitis is an immunologic response to an allergen, causing the conjunctiva and sometimes the cornea to become inflamed. The allergic reaction can occur after the person comes into contact with various allergenic substances, including pollen and mold spores. The eye will become easily red, itchy and watery, among other upsetting symptoms. The conjunctiva is the membrane inside the eyelid and it also covers the eyeball, having protective purposes. However, this is what also makes it so susceptible to irritation from various allergens, especially during the allergy seasons. This medical condition is quite often encountered, affecting a large percentage of the general population.

allergic conjunctivitis
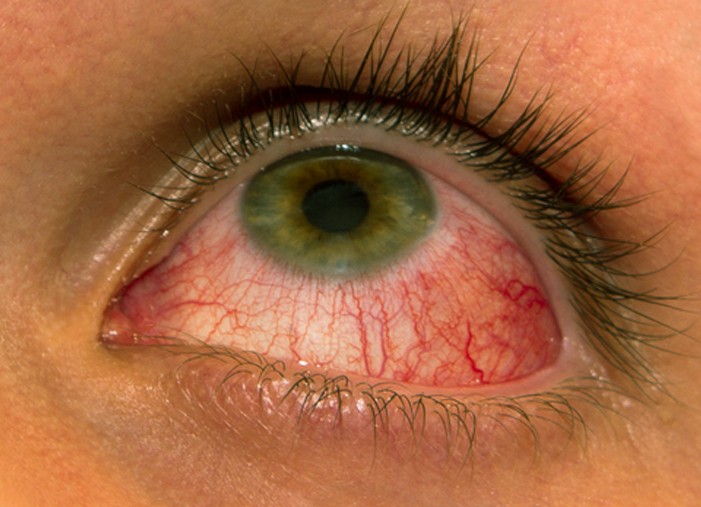
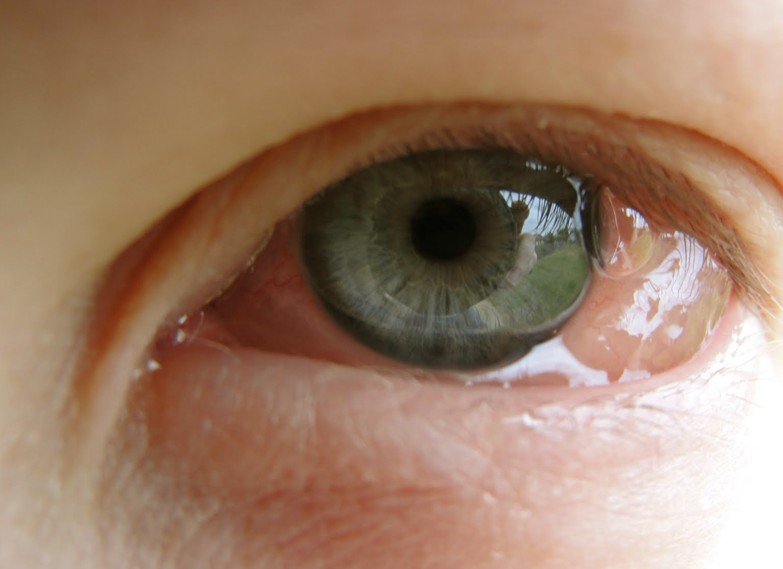
There are two main types of allergic conjunctivitis, meaning seasonal and perennial. In the first case, the condition is triggered by common airborne antigens, meaning tree pollen in the spring, grass in the summer and weed pollen in the autumn. The persons who suffer from seasonal allergic conjunctivitis do not exhibit any symptoms during the winter, as the transmission of airborne allergens is reduced to a minimum. On the other hand, the persons who suffer from perennial allergic conjunctivitis present symptoms regardless of the season; this is because their allergies are not caused solely by these allergens. Dust mite, dust from cockroaches, pet dander and even cigarette smoke can trigger perennial allergic conjunctivitis.

Symptoms of Allergic Conjunctivitis

These are the most common symptoms of allergic conjunctivitis:

Classic symptoms:

  • Injection of conjunctival vessels
  • Conjunctival and eyelid edema
  • Conjunctiva has a milky appearance

Vernal keratoconjunctivitis (two varieties – palpebral and limbal):

  • Itchiness
  • Increased sensitivity to light
  • Sensation of having a foreign body in the eye
  • Tearing
  • Blepharospasm
  • The cornea might be affected as well
  • The eyelid skin is not involved
  • Palpebral – presence of giant papillae that may cause drooping eyelids in severe cases
  • Limbal – papillae appear at the junction between cornea and the conjunctiva (limbus)

Atopic keratoconjunctivitis:

  • Perennial symptoms, aggravated during the winter
  • Itchiness of the eyelids (bilateral)
  • Watery discharge
  • Redness
  • Increased sensitivity to light
  • Pain in the eye
  • Eyelid margins can be infected by staphylococcus leading to blepharitis
  • Chronic eye rubbing leads to keratoconus

Giant papillary conjunctivitis:

  • Itchiness
  • Large cobblestone papillae
  • Mucoid or ropy discharge
  • Sensation of having a foreign body in the eye (especially if that person wears contact lenses)
  • Chronic bulbar conjunctival injection and inflammation

Possible Causes of Allergic Conjunctivitis

These are the most common causes of allergic conjunctivitis:

Common airborne allergens:

  • Tree pollen – birch, alder, cedar, hazel, hornbeam, horse chestnut, willow, poplar, plane, linden, olive
  • Grass – ryegrass, timothy
  • Weed pollen – ragweed, plantain, nettles, mugwort, fat hen, sorrel

Other allergens/irritating substances:

  • Dust mite
  • Cockroach dust
  • Cigarette smoke
  • Pet dander and saliva
  • Mold spores
  • Chemical substances (cleaning products, household detergents, perfume, cosmetics, skin care products)
  • Air pollution
  • Eye drops
  • Debris (giant papillary conjunctivitis)

Surgery (giant papillary conjunctivitis)

Treatment

These are the most common courses of treatment and home care remedies undertaken for the different types of allergic conjunctivitis:

Home care

  • Closed windows during hay fever season (increased pollen in the air) to minimize the exposure to the said allergen
  • Proper household cleaning (no dust)
  • Using a purifier for the indoor air (eliminates airborne allergens inside your home)
  • Avoiding the offending antigens (including those commonly found in cleaning products, dyes or perfumes)
  • Avoiding rubbing the eye (prolonged and excessive rubbing leads to the formation of keratoconus)
  • Applications of cold compresses on the affected eye can help to reduce the itchiness and inflammation

Medical treatment

  • Anti-histamines – the doctor might either recommend systemic or topical preparations, depending on the severity of the allergy. Some antihistamines have the power to block the histamine release completely, while others only reduce the histamine release.
  • Anti-inflammatory drugs – these can be either administered orally or as topical preparations (in the form of eye drops).
  • Corticosteroids – these are recommended only for more severe cases, contributing to a direct reduction of the symptoms (inflammation, itchiness etc.)
  • Artificial tears – these provide a barrier function and they act as the first line of defense for the conjunctiva. Moreover, if the conjunctiva comes into contact with a potential allergen, this increased film on the eye will wash it right away.
  • Vasoconstrictors – commonly administered at the same time with anti-histamines, these drugs reduce the vessel injection and the associated redness.
  • Mast cell stabilizers – these medications prevent the release of histamine as well, through a more complex mechanism.
  • Immunotherapy – delivered through subcutaneous injections or sublingual (oral).
  • For vernal conjunctivitis:
    • Mucolytic agents
    • Vasoconstrictors
    • Mast cell stabilizers
    • Pulsed-therapy steroid treatment
    • Topical cyclosporine
    • Surgery in severe cases
  • For atopic keratoconjunctivitis:
    • Mast cell stabilizers
    • Topical corticosteroids
    • Systemic antihistamines and corticosteroids
    • Systemic cyclosporine
    • Penetrating keratoplasty (severe corneal scarring or thinning)
  • Giant papillary conjunctivitis:
    • Change in the contact lens care routine
    • Rigid gas-permeable contact lenses
    • Mast cell stabilizers
    • Topical corticosteroids and antihistamines

How long does allergic conjunctivitis last?

The bad news is that the symptoms of allergic conjunctivitis persist throughout the entire allergy season, their intensity being different from one patient to the other. The best thing that you can do is avoid getting into contact with the allergenic substance as much as you possibly can and, if that happens, to take the anti-allergy treatment. The symptoms experienced during the allergy seasons can be properly managed with the aid of specific medication.

Is allergic conjunctivitis contagious?

Allergic conjunctivitis is the inflammation of the eye conjunctiva and an actual response of the immune system, triggered by a potential allergen. There is no infectious agent causing the appearance of allergic conjunctivitis, so you can be absolutely certain that this is not a contagious condition. It is not transmitted through objects of personal hygiene or by touching the person who has an allergy. This is simply a response of the immune system, trying to get rid of the allergen.

Allergic Conjunctivitis Pictures

Here are some of the pictures of Allergic Conjunctivitis…

allergic conjunctivitis pictures

allergic conjunctivitis pictures 2

allergic conjunctivitis pictures 3

allergic conjunctivitis pictures 4

No responses yet

Dislocated Shoulder

Mar 09 2017 Published by under Bone, Joints and Muscle

What is a dislocated shoulder?

Anatomically speaking, the shoulder joint is the most mobile joint in the body, having the possibility to move the arm in many directions. This ability comes from the fact that the shoulder joint is one of the most complex joints in the human body but it also increases the risk for dislocation to occur. This is in fact the most dislocated joint in the body.

The dislocation occurs when the head of humerus leaves its normal socket through a forced mechanism. The dislocation of the humerus from the glenoid fossa can happen in more than just one direction and the location of the humeral head will also give the description of the dislocation. There are many different types of dislocations but two of the most common ones are the anterior and posterior dislocation. In the anterior dislocation, the humeral head has reached a position in front of the joint (this type of dislocation accounts for 90% of all cases of dislocated shoulder). The posterior dislocation is the one in which the humeral head has reached the shoulder blade. Rare cases included inferior and intrathoracic dislocations.

Symptoms

Dislocated Shoulder Pictures

Dislocated Shoulder Pictures

These are the most common symptoms of a dislocated shoulder:

  • Excruciating pain – the pain will be so intense that the patient will refuse arm movements of any kind.
  • Spasms of the muscles surrounding the shoulder joint.
  • Inflammation or bruising around the shoulder joint.
  • Numbness or tingling.
  • Tenderness of the shoulder and sometimes the collarbone.
  • No palpable bone on the side of the shoulder.
  • In case of anterior dislocation:
    • Specific position of the arm (a little bit away from the body)
    • Pain is relieved by supporting the affected arm with the other hand
    • Damage to the axillary artery and nerve – paralyzed deltoid muscle and unilateral deltoid muscle atrophy
    • Additional damage to the suprascapular nerve and radial nerve
  • Shoulder has a specific appearance (as the humeral head is no longer in its socket, the shoulder might appear in a lower level, compared to the healthy one)
  • Upon physical examination, a bulge can be palpated in front of the shoulder joint
  • Pain can lead to the following systemic symptoms:
    • Nausea
    • Vomiting
    • Excessive sweating
    • Weakness
    • Fainting.

Causes of a dislocated shoulder

These are the most common causes that lead to the appearance of a dislocated shoulder:

  • In young people:
    • Trauma
    • Sports
    • Falls
  • In older people – the dislocation appears out of a combination of weakened joints and muscles plus a blunt force applied to the shoulder joint.
  • Anterior dislocations occur most often when the shoulder is in a vulnerable position, such as the one in which the arm is held over the head, the elbow is bent and an outside force is applied to the shoulder joint.
  • Posterior dislocations are rare but when they do occur, they have three main causes:
    • Lightning strike
    • Electrical injury
    • Seizure
  • Sports injuries lead often times to dislocated shoulders:
    • Contact sports – football, hockey (the shoulder is a vulnerable position when throwing the ball)
    • Sports with an increased risk for falling – skiing, gymnastics, volleyball (the shoulder is in a vulnerable position when hitting the ball)
  • Different traumas to the shoulder can lead to dislocation:
    • Motor vehicle accident – hard blow to the shoulder (strong force impact)
  • Falls can lead to shoulder dislocation as well:
    • Falling on an outstretched hand
    • Falling from a ladder
    • Tripping on different things (house accidents).

Diagnosis

These are the most common methods used for the diagnosis of the dislocated shoulder:

  • The diagnosis should be confirmed as soon as it is possible, as there are concerns related to the extreme pain and the joint relocation has to performed in the most efficient manner.
  • The doctor will talk to the patient about the way the injury to the shoulder has occurred and the circumstances surrounding it.
  • It will be important to mention to the doctor whether you have suffered previously from dislocated shoulder joints or not.
  • Be sure to mention if you suffer from any allergies, as a topical anesthetic will be used for the shoulder dislocation reduction.
  • The physical examination is the most important element of diagnosis, as it will concentrate to determine whether the shoulder appearance is normal and rounded or the shoulder appears to be squared off. Often times, the loss of the normal rounded appearance is identified (deltoid muscle is affected) and the humeral head can be palpated in front of the joint.
  • The inability to move the arm in any direction is also a sign necessary for the confirmation of this diagnosis.
  • The doctor will also try to identify if the blood and nerve supply in the arm have been affected:
    • Pulse in wrist and elbow
    • Test for sensation
  • X-rays in anterior and lateral plans will be performed not only for the confirmation of the diagnosis but also to ensure that there are no additional bone fractures that need to be treated as well.

Treatment

The main scope of the treatment is to reduce the dislocation, that is to bring the humeral head back into its anatomical socket. The closed reduction performed with local anesthesia is often successful but there are situations when the open reduction (surgical intervention) is more recommended.

These are the most common methods used for the closed shoulder reduction:

  • Scapular manipulation – the shoulder blade is rotated, the humeral head is dislodged and then the relocation occurs spontaneously.
  • External rotation (Hennepin maneuver) – the elbow is flexed to 90 degrees and the shoulder gradually rotated outward. The doctor continues to push the arm gently, until the shoulder relocation occurs.
  • Milch technique – this is a similar method to the one presented above, the difference lying in the fact that the arm is lifted above the head in order for the shoulder relocation to occur.
  • Traction-counter traction – in this method, the first step is to loop a sheet around the armpit. Then, one person will pull down on the arm and another person will pull on the sheet, basically applying counter traction, until the shoulder relocation occurs.

Dislocated shoulder surgery

The open reduction is recommended in the case where a tendon, ligament or piece of broken bone blocks the shoulder joint and prevents the humeral head from returning to its anatomical socket. Also, the dislocated shoulder surgery is recommended in patients who cannot change their occupation (this presenting an increased risk for shoulder dislocation) and also in the case of recurrent shoulder dislocation or the constant practicing of high risk sports. The arthroscopic approach has provided the best results for the open reduction of dislocated shoulders.

Recovery time

The recovery time depends on the severity of the shoulder dislocation and whether nerve or artery damaged have occurred. After the closed reduction, the doctor will put the shoulder in a sling or shoulder immobilizer, so as to guarantee that the shoulder joint stays immobilized and that the area heals properly. Anti-inflammatory medication will be recommended during the recovery period and sometimes the doctor will even recommend narcotic medication for severe pain. Ice packs can be applied to the affected area in order to reduce the pain or inflammation.

The recovery period can be of several months, during which you will have to follow the instructions of the doctor and go to physical therapy after the immobilizer has been removed. You need to rest your shoulder and avoid high risk activities, especially those that present a potential for a new dislocation. Do not be afraid however to move the joint otherwise the whole area will become stiff and you will lose the normal range of motion or suffer from muscle atrophy.

Physical therapy is essential in order to reduce the recovery time and guarantee a better healing of the area. A good physical therapy program can help you regain the normal range of motion in the shoulder and it will also prevent abnormal adherence from forming. Moreover, the exercises will be more and more difficult, so as to allow not only  for an improvement in the range of motion but also to guarantee that all of the muscles in the shoulder joint are strengthened.

Pictures

dislocated shoulder

No responses yet

Bunion Surgery

Mar 09 2017 Published by under Treatments

Bunion surgery is a medical procedure in which the surgeon cuts into the inner side of the foot, close to the big toe joint and remove any excessive soft tissue or realigns the bone. This surgical intervention is performed when other non-surgical treatments for bunions did not provide the desired results and it is often done for two purposes: one to relieve the excruciating pain and two, to realign the deformed joint. Sometimes, additional metallic wires might be used to restore the normal alignment of the big toe joint and hold it into place.

Even though there are almost one hundred of bunion surgery procedures available, not one guarantees complete elimination of the problem or the symptoms. The surgeon will decide on the best procedure according to the extent of the deformation and he or she might decide to perform more procedures at once, in order to obtain the best results. The main objective is to correct the existent deformity, thus allowing the patient to resume his or her normal daily activities.

Bunions appear as a direct result of a foot deformity, known as hallux valgus. The big toe actually turns outward, the entire joint being twisted towards that direction. The modifications appear in the area, the joint becomes prominent as there are a lot of excess soft tissue and bone. The most common cause that leads to the appearance of bunions is the prolonged wearing of shoes that are either too small or have a tip that is too tight. Medical conditions, such as arthritis or poliomyelitis can lead to bunions and it seems that there is the possibility of genetic inheritance. However, returning to the primary cause, it is important to mention that women are more affected by bunions than men.

Bunion Surgery Procedure

There are medical approaches when it comes to bunion surgery:

Tendon and ligament repair

This procedure is recommended when there is an imbalance between the lateral tissues around the big toe (too much constriction on one side and too little relaxation on the other side). The surgeon will intervene in order to shorten the relaxed tendon and also to make the constricted one longer.

Osteotomy

This procedure is performed often times simultaneously with the one presented above. The surgeon will make small cuts in the bone, bringing the bones into their physiological and anatomical position.

Arthrodesis

The damaged joint surface is removed and then the surgeon might decide to use wires, screws or plates in order to hold the joint together until the healing process is complete. This is a procedure recommended in patients who have severe deformations in their toes, with large bunions, those who have an underlying medical condition causing bunions (arthritis) or when other surgical procedures have failed to provide the expected results.

Lapidus procedure

This is a variant procedure of the one mentioned above, in which the joint between the metatarsal bone and the mid-food undergoes fusion.

Exostectomy (bunionectomy)

The excessive tissue and bone are removed from the joint and, sometimes, the surgeon might also decide to remove a part of the metatarsal head. This procedure is recommended only when there is a bulge on the side of the toe joint, without any additional deformation. It is not a common course of treatment, as it is believed that it does not correct the actual cause of the bunion.

Resection arthroplasty

The damaged portion of the joint is removed. This procedure is done in elder patients, in those who have already had other types of bunion surgery or in severe cases of arthritis. The joint will retain some of its flexibility, despite the considerable scarring.

Implant insertion

An artificial joint might be inserted in order to replace part or all of the affected toe joint.

Cost

The cost of bunion surgery depends on the geographical location, the facility in which the surgery takes place and the surgeon performing the operation. The overall cost is affected by the type of procedure chosen for your medical condition, the number of hospital days and other healthcare related costs. It is for the best that you check your insurance policy and see what is actually covered. On average, bunion surgery costs somewhere between $3500 and $5000.

Recovery time

The success of the recovery process is guaranteed if you follow the instructions that the orthopedic surgeon has given to you. The dressing care is of utmost importance; as you will leave from the hospital, the recently operated area will have a special bandage that holds the toe in the correct position. Moreover, you might wear a brace or a cast in order to further protect your foot. The sutures are going to be removed in the next couples of weeks but you will probably wear the supportive brace for six to eight weeks.

The healing process should be supported during this period and it is highly important that you maintain the area dry. You should not let water get in that area until it is properly healed. Also, it is very important that you do not bear weight on the said food during the first days after the surgery. You will have to walk using a cane or crutches, bearing weight on that foot only after the wound has healed. If there is a lot of inflammation and pain after the surgery, then you should keep the foot elevated and apply ice packs to the area. Special orthopedic shoes will have to be worn after the surgery and it is recommended that you wait a couple of months before you wear high heels.

Physical therapy is an important part of the recovery period, as a good program can help you increase mobility in the recently operated area and also to strengthen the muscles. The exercises in the first days of the surgery are going to be simple, their complexity increasing gradually as the wound heals and there is a lot more mobility in the area.

Bunion Surgery Pictures

Here are some of the pictures collection of Bunion…

bunion surgery pictures

bunion surgery pictures 2

bunion surgery pictures 3

Bunion Surgery before and after photos

bunion surgery before and after

bunion surgery before and after pictures

Video

Watch the Bunion surgery video to know more about the surgical procedure:

No responses yet

Sunburn Peeling

Mar 07 2017 Published by under Skin Conditions

You may have heard of the numerous benefits of exposure to sunlight, ranging from being an invaluable source of vitamin D which when stored in the body in the optimum amount helps in the fight against cancer, to helping to fight high blood pressure etc. However, the relationship between man and sunlight is not always a beneficial one. Over-exposure to the sun can cause damage to the skin.

Everyone at one time or the other has experienced some form of sunburn at varying degrees. Sunburn peeling is the body’s way of getting rid of damaged cells after sunburn. Besides the flaky skin that accompanies sunburn peeling, it could come with other symptoms like redness of the skin, discoloration of the skin, itching, extreme dryness and wrinkling of the skin. In addition to the pain and loose skins, discoloration could be very embarrassing. Particularly, sunburn peeling on face can be a serious source of worry.

You will learn everything you need to know about this very worrisome issue such as the causes, how long it takes the skin to heal from sunburn, how to exfoliate a peeling skin and a whole lot more.

Causes of Sunburn peeling

  • Sunburn is caused primarily by overexposure to ultraviolet radiation from the sun
  • Tanning lamps
  • Ultraviolet germicidal irradiation

How long does skin peel after sunburn?

The length of time it will take your skin to peel after sunburn depends on the degree of damage to the skin and the healing time.

First Degree Burns

This usually has a little inflammation with irritation on the skin. Only the outer skin layer is affected. Peeling off starts within 1-2 days and in three days it is completely healed. Most sunburns are usually first degree. This mild burn is not serious enough to disturb you from carrying out your daily activities. The treatment applied also plays a role. The healing time of first degree burn is usually a few days.

Second Degree Burn

This is more serious and the healing time is also longer. It is characterized by red bumps or sun poisoning rash and severe inflammation as well as discoloration of the skin. This burn goes beyond the skin surface into the deeper layer of the skin. The second degree burn may result in sore which takes longer to heal and may require over the counter drugs. The peeling therefore takes a longer period than the first degree burn.

Third Degree Burn

This is characterized by inflammation of the skin and damage of the inner layer of the skin. In this kind of burn, peeling does not usually occur because the nerves are also involved. Third degree burn really hurts and may leave permanent scar.

How To Exfoliate Peeling Skin After Sunburn

Typically as part of the body’s natural healing process, after sunburn, the skin begins to peel on its own. However, care must be taken not to hurry into exfoliating as this may lead to consequences you did not bargain for. To return your skin to its previous state without damage, follow the guidelines below.

sunburn peeling on face

Picture : Sunburn peeling on face

Take a shower

One of the steps you should take when your skin begins to peel off is to take a bath with tepid water.Do this up to two or three times daily with lukewarm water. This is to help soften the usually dry skin.

Reduce the itch

Some skins could be especially very itchy at this time and scratching it could do an irreversible damage to your skin. Applying ice on the surface of the itching area with a piece of soft cloth can help reduce the sensation. The cooling effect should bring down the itch and the hurts in a couple of minutes.

Hydrate your skin

You should apply a moisturizing cream or lotion to skin shortly after taking your shower. Different creams are available to help with sunburn but it is important to look out for the one that suits your skin. Applying Aloe Vera gel has been proven to work well. Moisturizing cream with hyaluronic acid component is also very effective.

Drink plenty of water

One trick that works when dealing with peeling skin is to drink plenty of fluid to keep hydrated from the inside. Avoid taking alcohol or caffeinated drinks. Drink plenty of water on daily basis to help keep the inside hydrated. As a rule of thumb, taking up to 10 glasses of water daily helps to achieve this task.

Don’t peel loose skin

sunburn peeling

Shortly after sunburn, the skin begins to rejuvenate and in the process the dead outer skin begins to come off. The temptation to peel off this sunburn skin is very high but care must be taken to avoid peeling it off forcefully as this can cause further damage, especially when there is sunburn peeling on face. This is what you should do; exfoliate only when your skin is no longer sensitive or inflamed. If you are worried about the loose flaky peeling skin, use nail scissors and trim the dead part very carefully. Do not attempt to tear off peel forcefully on loose skin as this could interfere with the skin’s natural healing process and leave scars in your skin.

Treatment for Sunburn peeling

Sunburn treatments are basically provided, not to heal skin or prevent damage to your skin, but to help reduce pain, swelling and irritation. If often advisable to adopt home remedies in very severe cases, you should seek a doctor’s advice. The following could be useful:

  • Analgesics: common over the counter pain and prescription pain relievers should help control the pain and swelling of sunburn, particularly when taken shortly after sun exposure.
  • Medications that control itching: Some medications are available to control itching. They can be applied to help reduce itching and speed up the healing process.

Home Remedies

Adopting natural remedies for the treatment of sunburn peeling has been proved to be very effective especially as some chemical creams can cause further irritation to the skin. Some of the home remedies that are effective include:

Coconut Oil

Coconut oil is composed mainly of saturated fat and lauric fatty acid that help to relieve inflammation and promote quick healing to sunburn skin. Apart from these qualities, it also helps to reduce discomfort occasioned by peeling and dryness of skin as well as provide nourishment and moisturizing effect to the skin.

Coconut oil is rich in vitamin D and E and other essential nutrients needed by the skin for healing. Rubbing coconut oil lavishly on the affected areas of skin helps to prevent permanent scars, wrinkles and discoloration on the skin because coconut oil possesses properties that help regenerate the skin

Aloe Vera

Aloe Vera plant has long been recognized as an amazing plant because of its healing properties. Referred often to as ‘’miracle plant’’ or ‘’natural healer’’, Aloe Vera gel has been used over several centuries for treatment of burns and skin irritations. It is widely renowned for its ability to regenerate the skin by stimulating the fibroblast cells which produce collagen and elastin, two natural proteins which help to rebuild and tighten loose skin. It also helps to hydrate and moisturize the skin.

Extract the gel and refrigerate for thirty minutes then apply on the affected areas. Leave on the skin to dry. Do this for as many as 6 times a day for several days until you achieve result.

Oatmeal

Oatmeal is very useful for the treatment of sunburn because of its ability to provide soothing relief for the skin. Oatmeal also has healing properties which help to exfoliate and moisturize the skin.

To use, pour two cups of raw uncooked oatmeal into tepid water in the bathtub. Put the affected part in the water, or simply soak up for some minutes, rinse off and air dry. Avoid scrubbing with a towel. Repeat this daily until everything clears up.

Honey

Honey has been in use for as long as history itself. Its ability to heal makes it one of the oldest known wound dressings. Honey is very potent for healing sunburns when it is applied on the skin. This can be quite helpful if you have sunburn peeling on face.

Prevention

Prevention still remains the best option available to anyone when dealing with sunburn. Being armed with the right information goes a long way to help. Some tips for prevention have been provided here to guide you.

  • Avoid sun exposure between 10 a.m. and 4 p.m. Ultra violet radiation is usually strongest between 10am and 4pm. If you have any reason to be outdoor at this time you have to make it as short as possible otherwise it is advisable to reschedule. Stay indoors at midday and reduce the risk of sunburn to your skin.
  • Cover Your Body Properly: It is almost impossible for someone to stay indoor during the risk hours. So the strategy to avoiding sunburn is to wear suitable clothes. Full sleeve and closely woven clothing to cover you properly should be preferable. Wear proper clothing that covers you and take care of your legs and arms. Clothing or outdoor gear that offers protection against the sun should be worn. Look out for clothes with ultraviolet protection factor (UPF) labels; such clothes are made to protect your skin from sunlight. Wearing wide brimmed hats of about 4” that covers your neck, scalp, nose, ears and forehead when outdoors surely does help.
  • Use Sunscreen: Selecting appropriate sunscreen provides protection for the skin. In choosing your sunscreen, ensure that it has a minimum sun protection factor (spf) of 30 or higher, which is a broad spectrum with the ability to protect the skin from ultraviolet A and B (UVA and UVB) rays.UVA and UVB rays are the two types of ultraviolet rays produced by the sun while UVB rays can burn your skin, UVA rays cause premature aging, wrinkles and dark spots on the skin. Apply sunscreen lavishly on the skin 15-30 minutes before exposure. If you are going to be outdoor for a long period, the sunscreen will wear off. You will need to reapply frequently when outdoor, including shortly after swimming and when you begin to sweat also. Keep babies younger than 6 months out of the sun.
  • Don’t use a base tan for protection. Some people wrongly assume that getting a base tan will give them the needed protection against sunburn. It has been proven however, that a tan doesn’t offer any real protection from the sun and tanning on a regular basis, whether in the sun or a tanning bed, can do long-term damage to your skin, so it should be avoided.
  • Dietary Protection: Some foods and food supplements have been found to play important roles in the protection against sunburn. Food supplements that contain polypodium leucotomos provide oral photo-protection and reduce sunburn.
  • Food rich in antioxidant and essential vitamin have been shown to help as internal sunscreen to help limit the damage to skin as a result of exposure to ultraviolet rays. Taking Vitamin C and Vitamin E supplement was shown in one study to reduce the amount of sunburn after a controlled amount of UV exposure. It has also been established in scientific literature in 2007 that beta carotene (Vitamin A) is helpful. It was also established that a long term supplementation had a protective effect against sunburn.
  • Astaxanthin is a very effective antioxidant which has been found to protect against sunburn effect when taken on daily basis. Take vegetables and fruits that are rich in antioxidants.

Conclusion

Sunburn can dent your self esteem and make you withdraw into your shell. Particularly challenging is sunburn on face which can make you look like a real masquerade. But with the tips we have highlighted here, we are sure your nightmares will soon be over. Just apply the tips and you will be surprised at the positive result you get. However, if things don’t get better, see the doctor for proper management.

No responses yet

Rotator Cuff Surgery

Mar 07 2017 Published by under Treatments

Rotator cuff surgery is a medical procedure that has as main purpose the repair of a torn tendon in the shoulder. There are two main approaches for this procedure, meaning the open surgery in which a large incision is made in the shoulder or the arthroscopic surgery, in which several small incisions are made. The surgeon will decide on the approach that is best used for your own particular condition; however, it is common knowledge that large tears or chronic problems are better repaired through open surgery. Arthroscopic surgery is more recommended for smaller tears and acute conditions.

rotator cuff

Rotator cuff

The rotator cuff is comprised of muscles and tendons that actually form the a cuff over the joint over the shoulder. The main purpose of the rotator cuff is to maintain the arm in the joint and also to allow for different movements in the said joint. The tendons of these muscles are often affected in various injuries but a torn can also result from over-using that particular joint (for example, in a sport or as occupational hazard). Rotator cuff surgery is recommended when the tear is severe or when the other non-surgical treatments have failed to provide the desired results. Often times, physical therapy is recommended before and after the procedure.

Procedure of Rotator Cuff Surgery

The open rotator cuff surgery involves making a large incision in the shoulder. After the incision has been made, the surgeon will detach the shoulder muscle (deltoid) in order to better visualize the site of the tear and have complete access to the tendon. Bone spurs can also be removed during this procedure and complex reconstruction or tendon transfer might be performed for large tears. The incision is closed with stitches or staples and a dressing is applied to the wound.

The arthroscopic rotator cuff surgery involves making several smaller incisions in the affected area. The surgeon will then insert an arthroscope through one of the incision and visualize the operation area with the help of the camera that this cable also presents. The area of operation will be displayed at an enhanced resolution on a video monitor and all the necessary instruments for the operation will be introduced through these small incisions. The surgeon will use small surgical tools in order to remove damaged tissue and fragments of bone, using suture anchors to attach the tendon to the bone. These suture anchors are made from special materials and they are in time absorbed by the body, so there is no need for removal.

Cost

The cost of the rotator cuff surgery depends on the geographical location, the facility in which the surgery is performed and also on the surgeon performing the actual surgery. Also, depending on the type of procedure that is recommended, you will have to pay a different price. It is common knowledge that the arthroscopic approach is more expensive than the open approach, especially if robotic or hand assisted devices are used during the procedure. It is for the best that you check your insurance policy before you go through with the procedure, so that you make sure you are covered.

When thinking about the cost of the rotator cuff surgery, you will also have to take into consideration the physician fees, the facility fees and anesthesia costs. Plus, if there are any complications during or after the procedure, the costs for the additional medical care will add to the bill. The average cost for the rotator cuff surgery with all the included fees can reach $50.000. Once again, it is recommended that you check your insurance policy and see whether you are partially or completely covered.

Risks

These are the most common risks associated with rotator cuff surgery:

  • Risks related to anesthesia – allergic reactions can range from mild to severe. This why you need to speak to your doctor and mention whether you have allergies to certain medications or not. Difficult breathing or vascular collapse will require emergency medical treatment.
  • Blood loss
  • Blood clots – these can travel to the lungs or legs, causing deep vein thrombosis
  • Shoulder weakness
  • Stiffness in the shoulder, resulting in limited mobility
  • Infection at the site of the operation
  • Muscle or tendon damage (during the intervention either the deltoid muscle or its tendon might be damaged; in some cases, a second surgery might be necessary to repair the damage)
  • Risk of repeating the surgery because the primary surgery did not provide the expected results, either in terms of symptoms or functionality (tears that are too large)
  • Nerve or artery injury (rare)
  • Complex pain regional syndrome (rare)
  • Re-rupturing of the rotator cuff
  • Excessive scarring at the site of the incision

Complications

These are the most common complications that can occur with rotator cuff surgery:

  • Post-operative frozen shoulder – this is primarily characterized by stiffness in the shoulder and it most commonly occurs in older people who have suffered surgery for tendon repairs. Physical therapy, injections with corticosteroids and additional surgery (capsular release) are recommended for the alleviation of symptoms.
  • Recurrent dislocation of shoulder instability
  • Stiffness is considered a complication only it has persisted for three months or more following the surgery
  • Deep vein thrombosis is both a risk and a complication
  • Persistent pain
  • Disruption of deltoid origin
  • Foreign body reactions (bioabsorbable materials)
  • Neurological injury (nerve injury, stretch neuropraxia, reflex sympathetic dystrophy
  • Post-operative infection with Propionibacterium Acnes
  • Death (rare cases)

Recovery time

The best recovery is guaranteed if the rotator cuff surgery takes places shortly after an injury has occurred. However, in elder patients, the condition might develop over a long course of time, without exhibiting too many symptoms. Large tears will require a complex surgical repair and the recovery period is going to be considerably longer. During the recovery period, physical therapy is essential so as to guarantee the success of the surgery. You have to understand that surgery performed on a tendon that is aged, frayed or thinned is not going to be as successful as the surgery performed on a healthy tendon. The same goes for the recovery period, it being longer in the first case.

Immediately after the surgery, the patient will be instructed to wear a sling and a shoulder immobilizer. This will prevent the shoulder from moving and it will guarantee a faster healing of the recently operated area. The recommended time to wear a sling depends on the type of procedure (open or arthroscopic) but on average the patients are recommended to wear the sling somewhere between four and six weeks after the surgery. The recovery period can range somewhere from three to six months, depending on the type of procedure, the size of the tear and other factors. Pain medication might be prescribed to deal with the symptoms.

Physical therapy is essential during the recovery period. The physical therapist will make a post-operative assessment, so as to decide what kind of mobility and strength you have in the shoulder after the surgery. After the initial assessment, you will be given a set of exercises that you will have to perform on a daily basis. In the initial period, the physical therapist will aid the movements you make in the shoulder joint and will even perform some of the movements himself. As the area heals and you regain your mobility, you will start to make some active movements yourself. The initial objective of the physical therapy program will be to increase the mobility in the shoulder joint and to allow, gradually, for movements in all possible plans. The last movements to be rehabilitated are going to be the rotations and horizontal flexion and extension.

The second part of the physical therapy program will be to strengthen the muscles of the rotator cuff. Here, you will be given once more sets of exercises that are meant to put those muscles to work, without excessive physical activity being involved. You will also be recommended to do some water physical therapy, as this is highly indicated for this kind of problem (in the water, you do not have to defeat the gravitation and the movements are more easily made). Progressively, you can start to swim and do other sports. The last part of the physical therapy program will concentrate on involving that particular shoulder joint in the daily living activities.

Video

Watch the Rotator Cuff Surgery video:

No responses yet

Microdiscectomy

Mar 07 2017 Published by under Treatments

What is Microdiscectomy?

Microdiscectomy also known as microdecompression represents a surgical procedure in which either a portion of a bone or vertebral disc is removed. The main purpose of this removal is to relieve the pressure applied to a nerve root, such as it the cause of neural impingement. By eliminating the pressure, the nerve is able to heal and the patient will no longer suffer from upsetting symptoms. This procedure is generally recommended for patients who have been diagnosed with vertebral hernia (especially in the lumbar region) but it is also used for the treatment of various radiculopathies.

The most common symptom of a radiculopathy is pain in different areas of the leg, depending on the nerve root that is suffering from impingement. After the microdiscectomy, the pain will be reduced almost immediately, even though the complete healing process of the nerve can take several months. Other symptoms, such as numbness and muscle weakness, will also take longer to subside but the pain relief is almost instant.

What to expect after microdiscectomy?

microdiscectomy

MicrodiscectomyPictures

In the first two days after the surgery, ice pack applications are recommended in order to decrease the pain experienced. However, these should not be applied directly on the skin and they should not be left for prolonged periods of time, or they can lead to further circulatory problems. After the surgery, you should expect to feel stiff or sore but these symptoms usually improve over the next few weeks. You might have a hard time sitting or standing or you might be able to resume such positions only after you have taken anti-inflammatory medication. The doctor will recommended that you start physical therapy as soon as possible; the physical therapist will not only show you what exercises you need to make but he will also teach you how to properly move.

When you get home, be sure to get proper rest and sleep, as this guarantees a better recovery. Increase the amount of time walking on a daily basis, as it is a known fact that movement can prevent problems such as constipation or pneumonia, plus it will help to get the blood circulating. During the initial period after the surgery, it might be for the best to avoid heavy lifting and other strenuous physical activity. Do not carry heavy grocery bags and avoid doing housework that requires a lot of movement. It is for the best that you wait until you are better. Avoid riding the car, do not stay too long in a position and talk to your doctor about any prolonged symptoms you might experience.

Procedure

A few years ago, this procedure was performed by doing a large incision in the back, cutting the upper muscles and removing the actual part of the bone or disc creating pressure on the nerve root. Today, thanks to the modern advancements in the field of medicine, doctors perform this procedure as microdiscectomy. The surgical exposure has reduced considerably, as the doctor uses telescopic glasses or a miniature microscope to visualize the affected area. This is also advantageous because it guarantees a faster recovery for the patient and less downtime. The microsurgical approach is considered to be minimally invasive and it can be used on elderly patients as well.

In order to perform the surgery, the surgeon will make a small incision in the affected area. He will then lift the back muscles, as this is preferred to cutting them. The next step will be to either remove the membrane of the nerve roots or to use a special microscope to better the see the nerve root. The part of the bone or the disc creating pressure on the nerve root is going to be removed. The important thing to understand is that this procedure does not affect the mechanical structure of the vertebral column.

Risks

These are the most common risks of microdiscectomy:

  • Injury to the nerve
  • Incontinence of the bowels or the urinary bladder (injury to the nerves that innervate the said regions)
  • Hemorrhage
  • Infection at the site of the surgery – in order to prevent infections, the doctor might decide to administer antibiotics before the surgery
  • Surgery fails to remove the fragments that cause pressure on the nerve root
  • Risk to damage the spine
  • Risk of condition becoming worse

Cost

The costs of the microdiscectomy procedure depend on the geographical location, the facility in which the surgery is performed and the actual surgeon performing the procedure. You need to take into account the additional costs of the surgery, including the facility fees, the physician’s and other medical staff fees. Plus, there are anesthesia costs that you will have to handle and, in case there are complications, the overall costs will increase. Keep in mind that post-operative complications can require additional care measures, these being supported by the patient as well.

The recommended thing is that you check with your insurance company and see whether this procedure is covered totally or partially. This information is going to prove out to be useful, especially since there may be certain clinics that work with your insurance. Also, be sure to check out their policy on pre-existing conditions, as this may be a determining factor as well. As this is not an emergency procedure, it pays to be informed and not rush into anything until you would have gathered all the needed information. Also, it might help to talk with other people who have gone through similar procedures. On average, such a procedure goes over $30.000 with all the feeds included.

Complications

These are the most common complications of microdiscectomy:

  • Dural tear – if the membrane protecting the spine is torn during the surgery, then the cerebrospinal fluid might leak out. This translates into more downtime for the patient, as staying put will allow for the leak to heal and the fluid to reabsorb.
  • Anesthesia complications – the patient can develop an allergic reaction from the anesthesia. If you suffer from any kind of allergy to medication, you will have to mention it to the doctor before the surgery. If the patient enters into vascular collapse after the administration of the anesthetic, emergency medical treatment will be required.
  • Postoperative discitis – this is an inflammation of the vertebral disc that can occur after the surgery.
  • Post-operative muscle hernia
  • Subcutaneous post-operative hematoma
  • Deep vein thrombosis – blood clots from the surgery area travel to the veins in the leg or into the lungs, causing vascular collapse and even death.
  • Lung problems (pneumonia)
  • Permanent nerve damage, resulting in paralysis
  • Complications can occur from wrong-level complications
  • Anterior vessel or visceral injuries

Recovery time

In the past, it was believed that the early mobilization of the spine after microdiscectomy could do more harm than good. Patients were advised to avoid bending and rotating their back, so as not to ruin the surgery. However, recent studies have shown that the early mobilization of the spine after microdiscectomy results in a faster healing process. What happens is that those patients, because of the significant pain experienced before the surgery, have limited their range of movement. By introducing an adapted physical therapy program in the early period, the patient will heal faster and better. The program should include stretching exercises and also something to develop more strength in the back muscles.

Pain management is extremely important after such an intervention. The doctor might recommend anti-inflammatory drugs and also narcotics, in cases where there is severe pain. However, it is a well known fact that narcotics can become addictive, this is why this treatment should be followed only for short periods of time. Narcotic pain medication should be replaced with regular anti-inflammatory medication as soon as it is possible. Return to usual activities is usually possible after a period of least eight weeks but this may be longer if complications occur during the surgery.

During this period, you can benefit from the help of a physical therapist. He or she will show you the best ways in which daily activities can be performed, so as to put as little pressure on the spine as possible. Each activity can either help or harm the spine; do not believe that you know better than a physical therapist and be sure to follow the exercise program that was given to you. You need to strengthen those back muscles in order to have a straight and healthy spine as well.

Video

Watch this useful video of Microdiscectomy to find more information about the surgical procedure:

No responses yet

Laparoscopy

Mar 06 2017 Published by under Treatments

What is a laparoscopy?

Laparoscopy is one of the modern-generation surgical techniques considered to be minimally invasive. For this type of surgery, a laparoscope is going to be used in order to reach a location inside the body from a distant point. The laparoscope is introduced into the body through a small incision, this being just one of the many advantages offered, compared to the regular open surgical intervention. Laparoscopy guarantees less bleeding and reduced pain for the patient, plus given the fact that incisions are smaller in size and number, the downtime is considerably reduced.

The laparoscope is actually a cable made from fiber optic and it can either be connected to a video camera or it has a special device at its own end. The operating field is illuminated by an attached light source and, during the surgery, gas is usually pumped into the abdomen in order to allow for better organ exposure and visibility. The most operations performed with the help of a laparoscope are in the abdomen or pelvis but there are many operations in the chest area that can be performed using this technique as well.

Laparoscopy Procedure

Laparoscopy can be performed using two methods:

Da Vinci surgical method

  • Multiple incisions are made on the skin
  • The surgeon controls the system located away from the patient; using two specific grippers, the surgeon will perform the surgery from a remote location. The hand movements, regardless of how complex they may be are tracked and the surgeon also receives feedback through them.
  • Each essential item for the surgery is located at a specific incision site (camera, pump for CO2, saline solution for cleansing, scalpel and other cutting tools)
  • These items may have different locations but they are all direct towards the same surgical objective.

Bonati surgical method

  • A single incision is made on the skin
  • The system has multiple control functions to deliver
  • Before the actual activation of the laser cutter, the saline cleansing solution and the CO2 pump have already operated together
  • The surgeon uses the inside camera and the additional cold light to visualize the area in which the operation is going to be performed and also to receive feedback.
  • The images are displayed with an enhanced resolution on a special monitor.
  • This surgical method is especially recommended for spinal interventions.

Cost

The cost of laparoscopy is dependent on several factors. First of all, you should know that this surgical procedure can be used either for diagnosis or treatment. The cost of laparoscopy will be different if the procedure is used to simply confirm a diagnosis or if there is an actual condition that needs to be treated. On average, you should expect to pay somewhere around $1500 to $5000 for a laparoscopy procedure. The general health insurance covers such procedures but you will have to check your policy and see what exactly is covered under this category.

Also, you should know that the price is influenced by the geographical area, the facility in which you decide to have the intervention and the actual doctor performing it. The fees that you will have to pay are not only related to the said surgery but also to the number of hospital stays, anesthesia and other care-related fees. Also, depending on the technology used for the laparoscopy procedure, the price might go higher. Robotic or hand guided assistance is clearly more expensive, so you will have to talk to your doctor about such problems and make sure that you are covered by insurance.

Recovery time

The recovery period depends from patient to the other and certainly it also influenced by the overall health of the patient. Immediately after the laparoscopy procedure, the patient will be kept under close observation, so as to make sure that no complications occur. The factors that influence the duration of recovery are the overall health, anesthesia reactions and the reaction to the actual procedure. Your vital signs will be monitored throughout the entire duration of the hospital stay, so as to make sure that no life-threatening complications appear shortly after the surgery.

In the initial period after the surgery, you will most likely feel pain and throbbing at the recently incision sites. Anti-inflammatory medication might help during this period. You might experience pain from the carbon dioxide used during the surgery, as this can irritate the diaphragm and also cause bloating. During the recovery period you will not be allowed to do heavy lifting or any activity that requires a lot of physical effort. As soon as you can, you can resume your normal diet. The only indication of a special diet is if you have had your gallbladder removed, as there will be certain types of foods that you will have to avoid, especially in the initial period after the surgery.

You have to understand that it takes time for the body to heal, even after a minimally invasive surgery. The best way to recover is to establish a daily routine and go through with it, rather than staying in bed and waiting to get better. A healthy diet, containing plenty of fresh fruits and vegetables, will also guarantee a faster recovery. Also, make sure that you drink plenty of water, as it is highly important to stay hydrated. Be sure to  quit nasty habits, such as smoking and search for nicotine replacement solutions. Visit a physical therapy and learn an exercise program that can help you with the faster recovery.

The recovery period may be slower in patients whose overall health is not so good. For example, diabetes patients recover more slowly from laparoscopic procedures and this is why it is recommended that they take things one by one. Also, smoking, drinking alcohol or an unbalanced diet can prolong the healing process. You need to learn how to take good care of yourself and make sure that you help the body to heal after the laparoscopy procedure. Otherwise, you might suffer from unnecessary complication and prolong the healing process unnecessarily.

Laparoscopy scars

One of the major concerns of any surgical procedure is related to the presence of postoperative scars. Given the fact that this is a minimally invasive surgery, the incisions are not very large and they usually heal very well on their own. However, there are natural remedies you can use at home in order to guarantee a better healing. Among the recommendations for home remedies after laparoscopic surgery you will find vitamin E and lavender oil. These can help to improve the appearance of laparoscopy scars and, being natural, they have no additional side-effects.

In case of more obvious laparoscopy scars, the doctor also might decide to send you to a dermatologist for expert advice. However, you should keep in mind that scarring can be prevented by taking good care of the incision site after the surgery and allowing it the necessary time to heal. Resting, drinking plenty of water and eating healthy are going to help to prevent excessive scar tissue from appearing at the site of the incisions. Before you decide to apply any topical cream, gel or ointment to the area of the operation, it is for the best that you consult your doctor and see whether he or she approves of the decision. Not all creams are good for such cases, so you need to be careful.

Pictures of Laparoscopy Scars

Here are some of the pictures collection of laparoscopy scars…

laparoscopy scars

laparoscopy scars pictures

laparoscopy scars pictures 2

No responses yet

Cataract Surgery

Mar 05 2017 Published by under Eye Health

Cataract surgery is a medical procedure in which the crystalline (the eye’s natural lens) is removed, after having developed opacity. In time, the crystalline is affected by the changes in our metabolisms and its fibers become more opaque; this lack of transparency causes either impairment or loss of vision. In the initial stage of cataract, the patient will feel like certain lights are too strong, including at night and the visual acuity will be diminished. The loss of vision appears gradually and, if surgery is not performed, that loss will become permanent.

In order to restore the vision in the eye affected by the cataract, surgery will need to be performed. The crystalline that has lost its transparency will be removed and it will be replaced by a synthetic lens. This is an outpatient routine surgical procedure performed by an ophthalmology surgeon, using local anesthesia and the patient feels little or not discomfort during the procedure. This procedure has a high success rate, restoring the lost vision in the eye and very few complications, given the fact that it is minimally invasive and it does not require extensive recovery.

What are cataracts?

cataractsAs it was already mentioned, the term cataract is used to describe the opacity of the eye’s natural lens that occurs in one or both eyes. Throughout the entire world, this is the number one cause that leads to blindness. The mechanism is simple. The clouding of the lens prevents light from coming in, resulting in loss of vision. Cataract is often a consequence of aging, as not only the crystalline fibers lose their quality but also pigment is deposited in the said lens. When these two things happen, the transmission of light into the eye is obstructed.

Cataract can severely affect a person’s quality of life. As the visual acuity decreases, that person will have difficulties when it comes to distinguishing colors and any contrast changes. Daily activities, such as driving a car, reading a book or even recognizing the faces of family and friends are going to be affected as the loss of vision becomes more severe. Bright lights are going to represent a great source of disturbance as well. In such situations, the most common course of treatment is cataract surgery and the results are exactly what the patient would expect, meaning vision restoring.

What to expect after cataract surgery?

Cataract surgery is an outpatient procedure and it lasts somewhere around an hour. After the surgery, most patients notice an improvement in their vision after a couple of days. At first, the vision might be blurry, as the eye needs to adapt to the new synthetic lens and also to heal. You will be required to visit the doctor for several follow-ups, two days after the surgery, after one week and then after one month. In the first days after the surgery, you will probably feel itchy and experience some mild discomfort in the area, but these symptoms are normal as the eye heals. Try to refrain from rubbing or pushing the eye, as you might dislodge the recently applied crystalline.

In order to protect the site of the operation from infection, the doctor will probably recommended that you wear an eye patch. This is recommended to be worn at night as well, guaranteeing the best recovery from the surgery. A post-operative treatment in the form of eye drops will be administered against possible sources of infection but also to reduce the inflammation and the increased eye pressure that may appear after the surgery. These symptoms disappear usually in the first days after the surgery but the complete healing process takes about two months.

Cost of Cataract Surgery

When it comes to the cost of cataract surgery, there are several factors that you need to take into consideration. Two of the most important factors are the type of surgery (instruments or technology used can differ from one type to the other) and also the type of intraocular lens that is going to be used for the actual surgery (some materials are more expensive than others). The cost for the cataract surgery will also be influenced by the area in which you live, the clinic you decide to have the procedure in and also the actual surgeon performing the surgery.

On average, in order to have cataract surgery on one eye, you will have to pay a little above $3000. However, if you want to benefit from the most modern cataract surgery, in which a special correcting intraocular lens is going to be placed inside the eye, then you will have to pay somewhere around $4500. You will have to check our insurance and see what kind of procedures are covered. Sometimes, a part of the surgery is going to be covered or a certain type of procedure will be included in the insurance. However, there are many types of procedures that do not cover modern generation cataract surgery procedures, so you might have to pay for such a procedure out of your own pocket.

Risks

In general, cataract surgery is a medical procedure that presents a low risk rate because it is minimally invasive. However, the patient presents a risk for infection to occur in the postoperative phase, especially if the proper hygiene measures are not taken and the eye is not protected by an eye patch. There is also the risk of retina detachment, especially if the patient does a lot of effort during the initial recovery period. Other important risks are related to the patient developing glaucoma (with or without increased eye pressure) and secondary cataract. Loss of vision is also a risk, especially when the synthetic lens is rejected by the body.

Apart from the intraocular infection (known as endophthalmitis), the patient who has undergone cataract surgery is at risk to develop cytoid macular edema (inflammation of the center of the retina) and also for the lens material to fall back into the vitreous cavity (this is known as posterior dislocation of lens material). Choroidal hemorrhage can also occur, the blood vessels supplying the retina being affected. The good news is that all of these risks are treatable and the patient’s vision will be brought back to its normal level, without any further damage.

Complications

These are the most common complications of cataract surgery:

  • Swelling of the cornea or the retina
  • Hemorrhage
  • Infection
  • Detachment of the retina
  • Glaucoma
  • Secondary cataract (posterior capsule opacity)
  • Vision loss
  • Excessive pain and redness
  • Eye discharge
  • Flashes of light in the field of vision
  • Dislocated intraocular lens
  • Increased pressure in the eye
  • Ptosis of the eyelid
  • Uveitis
  • Severe short-sightedness

Recovery time

In the first days after the surgery, your vision might be blurry but this is quite normal, as the eye needs to adjust to the new lens. Keep in mind that the natural eye lens has been replaced with a synthetic one and that it might take some time before the eye gets used to it, time during you might experience cloudy or distorted vision. However, you will notice a definite improvement in the next couple of days. During these few days, you might also have bloodshot eyes, as the vessels in the eye are extremely sensitive. This will disappear in a couple of days as well.

There are patients who declare that they can already see only after a few hours after the procedure. However, in the majority of the cases it takes for about two weeks before the vision is improved and the focus is clear. As for the complete healing process, this takes about two months. The initial period is the hardest, as bruising can appear around the eye from the anesthesia, plus there might be some pain experienced. The majority of the patients have a difficult times not scratching or pushing on the eye.

Cataract surgery is most often done on each eye at the different moments. So, if you have just had cataract surgery on one eye, you will have to wait for it to heal and the adjustment to the new lens to be completed, in order to have the other eye done as well. Sometimes, after the cataract surgery, the patient will have to wear glasses for a short period of time but this depends on the success of the procedure and on the presence of other eye problems that might affect the vision as well.

Video

Watch the Cataract Surgery Video to find out more information about the procedure:

No responses yet

« Prev - Next »

© 2011-2025 MDDK.com - Medical Tips and Advice. All Rights Reserved. Privacy Policy
The health information provided on this web site is for educational purposes only and is not to be used as a substitute for medical advice, diagnosis or treatment.