Diseases General Health Skin Conditions

Archive for February, 2016

Dissolvable Stitches

Feb 25 2016 Published by under General Health

What are Dissolvable Stitches?

Stitches are used in the surgical field, being made with the help of a threaded needle. The method is known as surgical suturing and it is used by a wide range of medical professionals, including oral surgeons, general surgeons and even doctors performing surgery on animals. The advancements in the medical field have allowed for new stitches to be used, the dissolvable stitches represent an often popular choice. These are also known as absorbable sutures and they are recommended for the suturing of both internal and external wounds.

Unlike the normal stitches, the dissolvable stitches will be absorbed by the body and they do not need to remove. This means that the recovery time after a surgery is considerably reduced and the patient will not need a second visit to the doctor’s office to have his stitches removed. Today, these kinds of stitches are chosen for the suturing of superficial wounds but also for complex surgeries that require internal stitching, such as the surgery on the heart or the transplantation of different organs. The main thing to keep in mind is that dissolvable stitches will allow for a wound (internal or external) to heal properly, being resorbed without any additional consequences.

What are dissolvable stitches made of?

dissolvable stitches picsThe human body is designed so as to eliminate any foreign substance, when coming into contact with it. This is the reason why dissolvable stitches are resorbed on their own, as the body tries to eliminate them as they are foreign substances. The materials chosen for the making of dissolvable stitches include collagen, hair or silk. A wide range of other artificial materials can be chosen for the making of these stitches – the important thing is that the right material is selected, so as it can be easily broken down by the human body.

How long for dissolvable stitches to dissolve?

The necessary time for these stitches to dissolve is mainly influenced by the material from which they are made and the area in the body where they are used. Also, the surgeon might decide on stitches made from a particular material if he/she wants to use them internally/externally. It goes without saying that the stitches applied on an external wound will take less time to dissolve, as they are superficial. On the other hand, internal stitches may take a longer time to dissolve, as the wound is deeper located and it takes considerably more time to heal.

On average, it takes somewhere around one or two weeks for the stitches to dissolve. After the surgery has finished and you wake up from the anesthesia, the doctor will guide you through the healing process and he/she will take time to explain how long it will take for the stitches to dissolve. Also, it can happen that the stitches do not dissolve entirely and you will need to visit the doctor in order to have them removed. However, this occurs only on rare occasions and the removal procedure is quite simple.

Features

There are several features that dissolvable stitches present, such as:

  • Decomposition rate – it is important to understand that this rate varies according to the wound and how deep it is. As it was already explained, the dissolvable stitches for international wounds take a longer time to dissolve. On the other hand, the ones used for superficial, external wounds are characterized by a rapid decomposition rate.
  • Elasticity – the degree of elasticity varies according to the type of wound and its location on the body. Often times, the surgeon will choose dissolvable stitches that have a higher elasticity to offer, for wounds that are superficial and external. Also, if the wound has occurred in an area where is a lot of movement (for example, the elbow or the knee), it is important to choose dissolvable stitches with high elasticity. Otherwise, the wound will re-open and it will take considerably longer for it to heal.
  • Thickness – the thickness of the dissolvable stitches depends on how deep a wound actually is. The surgeon will choose less thick stitches for external and superficial wounds, preferring however thicker stitches for the internal or deep wounds.
  • These stitches are resorbed in a natural manner by the human body, as opposed to non-dissolvable stitches.
  • Unlike non-dissolvable stitches which require further removal, these stitches go away on their own and they do not require a second visit to the doctor’s office.

How do dissolvable stitches work?

When a doctor performs a surgery, whether internal or external, the wound needs to be stitched up. The doctor will decide to use dissolvable stitches, as these are easily resorbed and they do not require follow-up. If you are wondering how do dissolvable stitches work, then you should know these are perceived by the body as an unknown substance. When an unknown substance is identified as present in the human body, regardless of its location, the body will try to dissolve it. This is the reason why dissolvable stitches are resorbed without effort.

Depending on the wound’s location and depth, the doctor might decide to apply a higher number of stitches. When applied, dissolvable stitches function by helping the wound remain closed and heal properly. They remain in the body for as long as it is necessary for the wound to heal and then they gradually fade. In plastic surgery, dissolvable stitches are often chosen for their ability to be resorbed. They work in the same way as it was explained above, the main advantage being that they present a reduced risk for scarring. On the other hand, on internal wounds, the surgeon might decide to choose thicker dissolvable stitches, as these will work by keeping incisions made on vital organs close together.

In conclusion, dissolvable stitches are recommended for both internal and external wounds, delivering the advantage of rapid decomposition. The doctor will decide whether the wound should be closed with the help of dissolvable stitches or not. Also, it is important to maintain the recently sutured area clean, so as to prevent secondary infections that might appear.
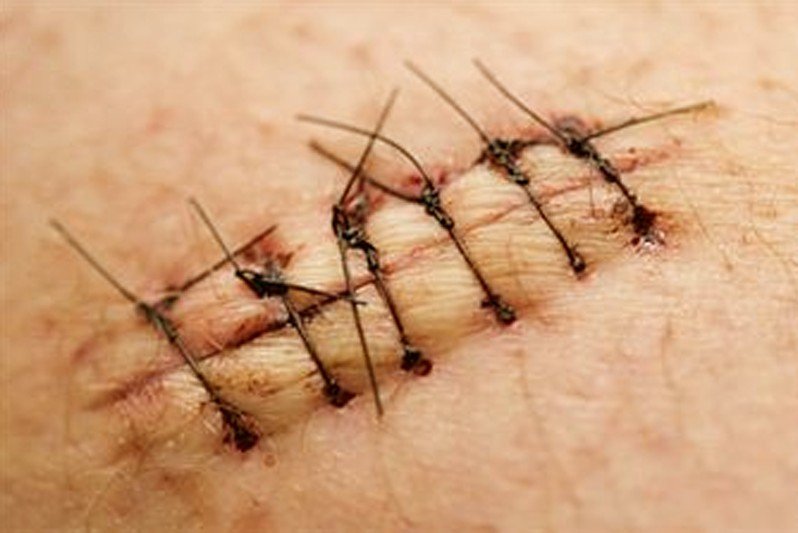
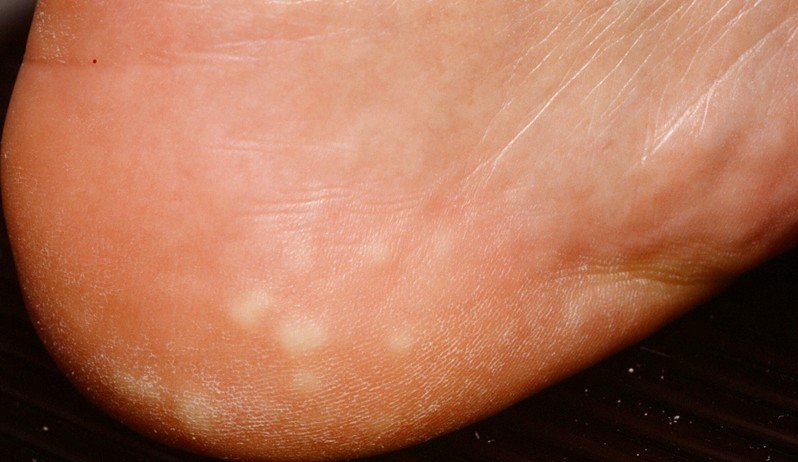
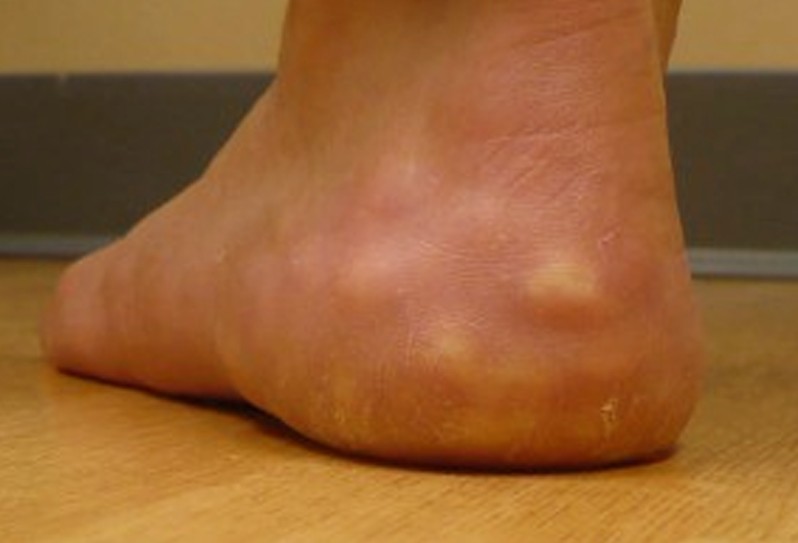
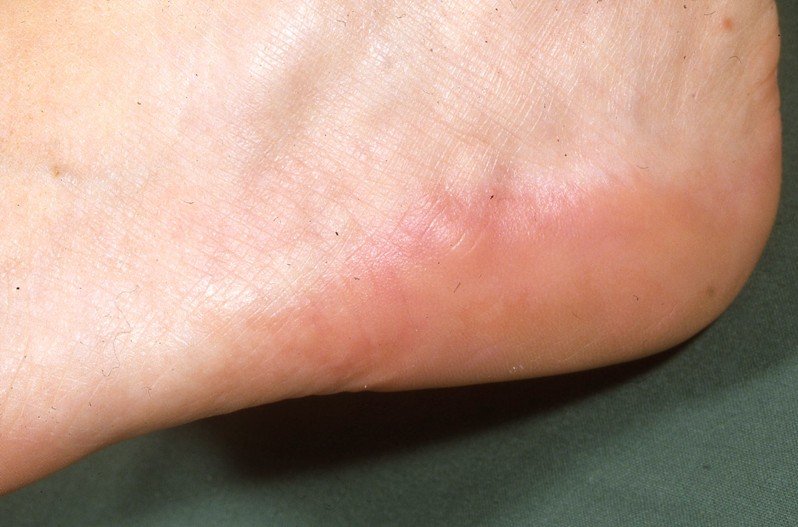
Pictures

Here are some of the pictures of dissolvable stitches…

dissolvable stitches

dissolvable stitches pictures

dissolvable stitches pictures 2

No responses yet

Cortical Cyst

Feb 20 2016 Published by under Kidneys and Urinary System

What is Cortical Cyst?

The cortical cyst is a common condition that affects people of different ages and genders. The name of the cyst is given by its location, meaning the renal cortex. The renal cortex is situated outside the kidney, being responsible for the filtering of the blood and removal of toxins from the body. The cortical cyst appears as a sac that is filled with liquid. The important thing to understand is that a person can have just one cortical cyst or several. Also, it can appear on just one kidney or it can affect both kidneys.

The severity of the cortical cyst varies according to the existence of an underlying condition. If the patient has kidney problems, then the appearance of the cortical cyst can impair the kidney function even more. If there are no underlying conditions, the cortical cyst is a benign condition and it does not cause complications. The correct diagnosis of the cortical cyst is essential to choose to right treatment. For diagnosis, the doctor might decide to perform an imagining investigation such as an ultrasound, MRI or CT.

If you have been diagnosed with a cortical cyst, then the prognosis is not worrying and the treatment is easy to follow. This is because the cyst is located outside the kidneys and not inside the actual organ. Cortical cysts are more common in older people and they have the tendency to grow with the passing of time. In a lot of people, they do not cause symptoms.

Cortical Cyst Symptoms

These are the most common symptoms of the cortical cyst:

  • If the cortical cyst becomes large enough, a palpable mass can be felt in the kidney area.
  • As the cortical cyst might have an impact on the function of the kidneys, the person might feel the need to urinate frequently.
  • The cortical cyst can lead to pain. The pain can radiate from the kidney area to other parts of the body, such as the back, abdomen, ribs or hip. The pain can range from mild to severe, being often described by the patients as dull.
  • The color of the urine can change – if there is a blood in the urine, the color can change to a darker shade (hematuria). The urine can also contain large quantities of protein, a condition known as proteinuria.
  • High-running fever.
  • High blood pressure – as the kidneys are known to regulate blood pressure, a renal cyst that is larger in size can lead to high BP. This is because the cyst can lead to ischemia in the kidneys, with increased renin secretion.

What are the Causes of Cortical Cyst?

Despite the advancements in the medical field, the causes that lead to the appearance of cortical cysts are yet to be identified. Patient studies performed on controlled groups have suggested that the glomeruli in the kidneys might have an abnormal structure that favors the appearance of the cortical cyst (congenital modification). In certain patients, the renal tubules are structured abnormally as well. These abnormal modifications predispose these patients to infections, among other problems.

There are two predisposing factors that contribute to the appearance of cortical cysts, meaning the age and the gender. The incidence of cortical cysts increases as one advances in age and it seems that there are more men diagnosed with this problem than women. Aging is not necessarily a factor for appearance, as many of these cortical cysts appearing in middle-aged people but they evolve with age. They become obvious in patients who are older, as they have grown to a considerable size to cause upsetting symptoms.

Cortical Cyst Treatment

The treatment recommended for the cortical cyst depends on the size. Small cysts do not cause any symptoms and they are often detected by accident. If the doctor will identify a cortical cyst that has less than 3 cm in diameter, then no treatment will be prescribed. However, you will have to visit the doctor’s office on a regular basis, to have the cortical cyst monitored. If the cyst becomes enlarged, causing upsetting symptoms, then the doctor might re-consider and prescribe treatment for your condition.

Surgical removal is recommended in cases of cortical cysts that have reached a considerable size, causing a wide array of symptoms. The procedure is simple and it is often done with local anesthesia. The doctor will use a special needle, guided through ultrasound, in order to reach the cortical cyst and extract the fluid. After the fluid has been completely extracted from the cyst, alcohol will be applied inside the cyst to prevent secondary infections.

If you are interested in natural remedies that can help you reduce the size of your cortical cyst, be sure to use herbs. Herbal treatments applied locally to the kidney area will not solve the problem completely, but they will help with the size reduction and they will improve the symptoms experienced.

As the exact causes of the cortical cyst are not known, the doctor might recommend that you make several lifestyle changes. These are related to quitting unhealthy habits such as smoking and alcohol drinking. You will be recommended to follow a healthier diet, based on fresh fruits and vegetables. Also, the doctor will indicate you to be physical active. All of these changes can prevent the cortical cyst from becoming larger and causing more upsetting symptoms. Also, they can help you keep the condition under control and delay surgery as much as it is possible.

One of the most important changes that you need to make is reduce your intake of sodium. Sodium is known to have a negative effect on the blood pressure; if you are already suffering from a cortical cyst, then a large intake of sodium will only contribute to increasing your blood pressure even more. Choose a diet that is low on sodium and you will also protect your kidneys; if the kidneys are protected, then the cortical cyst will be kept under control as well. If you are in a lot of pain, the doctor might prescribe anti-inflammatory medication to relieve the symptoms.

Also read:

No responses yet

Constant Burping

Feb 18 2016 Published by under General Health

Burping is defined as the release of air through the mouth. The process is noisy, as the air is forcefully released from the stomach. Often presented as belching, the constant burping can also be accompanied by different odors (depending on the foods that were previously eaten). It is important to understand that burping is a natural process, as the gas accumulated in the stomach has to be released. However, when a person suffers from a digestive problem, the burping might be more frequent than it is normal.

By addressing the underlying digestive problem with home remedies, the frequency of the burping will be reduced as well. However, before considering a particular home remedy, it is important to identify its exact cause. Constant burping can cause a lot of discomfort and it can also have psychological consequences, as the person feels ashamed when being in public. The proper treatment of the root cause will eliminate the constant burping and all of the associated discomfort that comes with it.

While burping is a normal physical occurrence, one must learn how to draw the line between normal and pathologic. If you notice a change in the burping frequency or if the process becomes noisier than usual, perhaps you should consider visiting a doctor. Also, you will notice that after the burping, you might feel a burning sensation on your esophagus. This might be an indication that you are suffering from gastro-esophageal reflux. Selecting the proper home remedies for this problem will contribute to the improvement of burping as well.

Home remedies are recommended for constant burping, as they do not have harmful side-effects. Also, the doctor will probably recommend that you change your diet, so as to avoid foods that are causing a lot of gas. Sometimes, the beverages that you drink are directly responsible for the constant burping. You should avoid sodas, as these contain a lot of harmful gas. A healthier lifestyle will make you feel great and not bloated, feeling the constant need for burping.

Causes of Constant Burping

These are the most common causes of constant burping:

Excessive swallowing of air

This is a medical condition known as aerophagia. It appears in persons who do not take their time to eat, thus swallowing a lot of air but also in those who prefer sodas. Drinking liquids through a straw will also lead to this problem.

Diet

The wrong diet can lead to constant burping.

  • Foods that produce a lot of gas include: fat foods, chocolate, fast food, highly refined products or those who have gone through several processing stages.
  • Acidic foods are known to cause a lot of gas plus that burning sensation that remains after the actual burping.
  • Vegetables – you might not have known that but there are veggies that enter a process of fermentation when ingested. They reach the stomach and cause a lot of gas. Among these veggies, be sure to avoid beans, onions and cabbage.

Accidental swallowing of indigestible products

The build up of small fragments can cause a partial bowel obstruction, leading to the accumulation of gas.

Digestive problems

  • Gastro-esophageal reflux – after a person eats, the acid from the stomach is produced in excess and it leads to burping. The patient also suffers from a burning sensation on the esophagus.
  • Gastritis – this is the inflammation of the stomach lining, being caused by a wrong diet or stress. The patient suffers from stomach pain and feels the need to burp constantly.
  • Irritable bowel syndrome – this appears in persons suffering from anxiety. The bowels are under constant stress and a lot of gas is produced. Besides the constant burping, patients also suffer from bloating and diarrhea/constipation.
  • Hiatal hernia – this condition occurs when the stomach is practically drawn into the thorax through the hiatal opening. It can lead to gas buildup, among other modifications.
  • Gastric ulcer – this occurs if the stomach gastritis is left untreated. A hole appears in the interior lining of the stomach, leading to a lot of pain, burning sensation and constant burping.
  • Paresis of the stomach – if the stomach muscles function too slowly or they are unable to function at all, then the food will remain in the stomach for a prolonged period of time and excessive gas will be produced.
  • Gastric cancer – apart from the constant burping, patients suffering from this condition exhibit vomiting, gastric hemorrhage and excessive pain.

Pregnancy

The digestion process is slowed down by the pregnancy, thus causing the accumulation of gas and constant burping.

Home remedies

These are the most common home remedies you can consider for constant burping:

Use herbs that can help with flatulence

The following herbs are recommended for such purposes:

  • Chamomile – Chamomile tea
  • Fennel
  • Mint
  • Ginger – Fresh/capsules/tincture, Ginger tea
  • Burdock
  • Cardamom : Cardamom tea – better food digestion, reduced burping
  • Peppermint :Peppermint tea , Chewing of fresh mint leaves

Include foods in your diet that help you maintain a healthy digestive system

  • Fenugreek seeds
  • Other types of seeds (contain active substances that contribute to the expelling of gas):
    • Fennel
    • Anise
    • Celery
    • Caraway
    • Cumin
  • Yoghurt – probiotics do wonders for the gastrointestinal tract, as they help you maintain healthy bacteria and eliminate the bad ones
  • Fresh papaya – papain enzyme helps with the release of excessive gas.

In conclusion, there are many home remedies that can applied for the reduction of burping frequency. All of these home remedies are meant to reduce the amount of gas produced in the gastrointestinal tract, helping not only with the burping but also with the stomach pain, burning sensation and other upsetting symptoms. In order for the home remedies to be effective, one must avoid foods that cause excessive gas and quit bad habits such as smoking or drinking alcohol. Being physically active also helps a person maintain good bowel movements, reducing the frequency of burping. Take your time to eat, including to chew the food before actually swallowing it.

No responses yet

Piezogenic Pedal Papules

Feb 18 2016 Published by under Diseases and Conditions

Piezogenic pedal papules are lesions that appear on the feet and wrists. These can either be accompanied by pain or be asymptomatic and they usually take the form of papules. It seems that they appear when fat herniates through the dermis, having a characteristic popular appearance. This is a common medical condition and generally asymptomatic in the majority of people. It is not genetically inherited and it is not related in general to connective tissue disease (in certain cases, it might be associated with such conditions but this is not a direct cause). As for the actual papules, these become obvious when the person stands up, distributing the entire body weight on the heels.

Symptoms of Piezogenic Pedal Papules

These are the most common symptoms of the piezogenic pedal papules:

  • Skin lesions in the form of papules appear on the feet and wrists
  • Pale to skin-colored
  • Obvious when weight is distributed on the feet (standing up), disappear when the person sits down and the weight is reduced
  • Bilateral involvement
  • Most often affects the heel of the foot, including the medial, posterior and lateral side
  • In the wrist, the volar surface is the one most affected (because of the pressure)
  • Pain might accompany the papules, preventing the person from performing certain activities
  • The papules present on the feet or wrists can be easily compressed

What are the Causes of Piezogenic Pedal Papules?

These are the most common causes associated with the appearance of the piezogenic pedal papules:

  • Excessive weight – obese patients have more weight to bear on their feet and this is why they present an increased risk for fat to herniate through the dermis layer of the skin
  • Occupation
    • Standing for prolonged periods of time
    • Constant pressure applied to the wrist
  • Associated with Ehlers-Danlos syndrome (collagen disorder)
  • Idiopathic (unknown cause)
  • Orthopedic problems
    • Flat feet
  • Can occur in newborns (no predisposition)
  • Excessive weight bearing (physical exercise or other vigorous physical activity)
  • Repetitive pressure force on the said areas

Diagnosis

These are the most common methods used for the diagnosis of piezogenic pedal papules:

  • Clinical examination
    • Identification of fat herniating through the dermis
  • No laboratory analysis
  • No imaging studies
  • Differential diagnosis – this can be made with the following medical conditions:
    • Infantile pedal papules (bilateral congenital adipose plantar nodules/precalcaneal congenital fibrolipomatous hamartomas/pedal papules) – appear in newborns
    • Xanthomas – painful lesion that occurs most often on the buttocks but can affect other areas of the body as well
    • Tophi – appear in patients with gout, being represented by solid urate that deposits in the connective tissue.

Treatment

These are the most common treatment courses and recommendations made for people diagnosed with piezogenic pedal papules:

  • No oral or topical medication available or necessary
  • Orthotics and other devices are recommended in patients who exhibit symptoms
    • Supportive external pressure device
    • Heel taping
    • Compression stockings
    • Foam rubber foot pads
    • Foam-fitting plastic heel cups
  • Rest and elevation might help with the symptoms (temporary relief)
  • Non-surgical approach
    • Injections with betamethasone and bupivacaine – these are recommended for patients who have been diagnosed with Ehlers-Danlos syndrome, reducing the painful symptoms. Repeated injections are necessary for complete pain relief.
  • No surgery has proven to be effective for the treatment of piezogenic pedal papules but the surgical approach can be recommended for a skin lesion that is persistent and intensely painful.
  • Avoiding periods of prolonged standing, walking or running can help if the papules are painful (practically, the patient is recommended avoid any kind of physical activity that might involve excessive or prolonged weight bearing)
  • In case of excessive weight, patients are recommended to follow a weight loss program
  • Recent studies recommend electro-acupuncture as treatment for this medical condition.

Pictures

Collection of pictures of Piezogenic Pedal Papules…

piezogenic pedal papules

piezogenic pedal papules pictures

piezogenic pedal papules pictures 2

piezogenic pedal papules pictures 3

piezogenic pedal papules pictures 4

piezogenic pedal papules pictures 5

piezogenic pedal papules pictures 6

piezogenic pedal papules pictures 7

piezogenic pedal papules pictures 8

piezogenic pedal papules pictures 9

No responses yet

Keratoderma Blennorrhagicum

Feb 18 2016 Published by under Skin Conditions

Keratoderma Blennorrhagicum is a manifestation on the skin that appears in patients diagnosed with reactive arthritis (this condition was previously known as Reiter syndrome). The condition manifests itself by lesions that appear on the skin, initially on the palm of the hands and soles of the feet. The lesions have the tendency to spread, affecting other parts of the body, such as the scrotum, scalp or trunk. Because of their appearance, the lesions might be easily confused with the ones from psoriasis. Keratoderma blennorrhagicum is one of the symptoms that can be used for the clinical diagnosis of reactive arthritis.

Symptoms of Keratoderma Blennorrhagicum

These are the most common symptoms of keratoderma blennorrhagicum:

  • Lesions in the form of pustules or vesicles appear on the skin
  • Lesions have a waxy texture
  • The color of the lesions can range from yellow to brown
  • The lesions can join together, leading to the appearance of patches or plaques on the skin
  • When lesions are clustered, the patches or plaques are scaly or crusted
  • Desquamating edge surrounds the lesions
  • The large patches can appear on the face as well, being red and scaly
  • Sometimes the lesions can take the form of nodules, that are hard and tender to the touch
  • Lesions appear initially on the palm of the hands and soles of the feet, extending to other parts of the body
  • Lesions can be painful and uncomfortable
  • The vesicles or blisters are filled with pus
  • It can also affect the hand or toe fingers along with the nails
  • The patient might also suffer from mouth ulcers, affecting the entire oral cavity (tongue, lips, gums, mouth roof, soft palate)
  • Characteristic lesion – rash on the head of the penis
  • The lesions are more often encountered in the genito-urinary reactive arthritis than in the gastro-intestinal variant

Causes of Keratoderma Blennorrhagicum

The exact cause that leads to the appearance of the Reiter syndrome has yet to be identified but it seems there is a genetic predisposition. Keratoderma blennorrhagicum appears, as it was already mentioned, in the genito-urinary variant of the Reiter syndrome or reactive arthritis. This variant is caused by a urethral infection (most commonly with Chlamydia trachomatis), transmitted from one person to the other through sexual contact. The lesions on the skin are actually a reaction of the body to the infection with Chlamydia, hence the name reactive arthritis. Keratoderma blennorrhagicum remains a primary symptom of diagnosis, along with the other manifestations of the condition.

Diagnosis

Keratoderma blennorrhagicum is often diagnosed within the complete diagnosis of reactive arthritis. The clinical examination is very important, as it allows for the observation of the skin lesions and other modifications. As keratoderma blennorrhagicum appears in the genito-urinary variant of the Reiter syndrome, the doctor might check if there is any abnormal discharge from the urethra (sign of infection). A complete blood count might also detect genetic markers and signs of inflammation in the body. X-rays might be recommended in advanced stages and not for the confirmation of the diagnosis. The clinical examination remains the most important method to confirm the diagnosis.

Treatment

Reiter syndrome cannot be cured but its symptoms, including keratoderma blennorrhagicum, can be treated with success. If the patient is in the active phase of the disease, antibiotics are going to represent the primary course of treatment for keratoderma blennorrhagicum. This is because the infection caused in the urethral tract has to be properly treated for the other symptoms to subside. Anti-inflammatory medication might also be prescribed to reduce the upsetting symptoms, such as inflammation and pain. The lesions on the skin can benefit from the same treatments as the ones for psoriasis, including topical corticosteroids and other creams.

Keratoderma Blennorrhagicum Pictures

Collection of images, photos and pictures of Keratoderma Blennorrhagicum…

keratoderma blennorrhagicum

keratoderma blennorrhagicum pictures

keratoderma blennorrhagicum pictures 2

keratoderma blennorrhagicum pictures 3

keratoderma blennorrhagicum pictures 4

keratoderma blennorrhagicum pictures 5

keratoderma blennorrhagicum pictures 6

No responses yet

Tinea Faciei

Feb 18 2016 Published by under Skin Conditions

Tinea faciei is a superficial infection of the skin. It is part of the dermatophyte skin infections and it can affect people of different sexes and ages. In children and in women, tinea faciei affects the skin on the face, including the chin and the upper lip. In the male population, this infection is known as tinea barbae, as it occurs only on areas that have hair (such as the beard area).

What happens is that the dermatophytes (which are actually keratinophilic fungi) will release enzymes (known as keratinases). These enzymes are going to invade the upper layer of the epidermis, causing the lesions on the skin and an inflammatory reaction. Tinea faciei occurs all over the world but it has a higher frequency in the tropical regions. This is because the high temperatures and the constant humidity are considered to be triggering factors.

What are the Symptoms of Tinea Faciei?

These are the most common symptoms of tinea faciei:

  • Atypical features on the glabrous skin of the face
  • Lesions are single or multiple in number
  • The lesions are in form of red patches, papules or vesicles
  • The patches can be round or oval as shape
  • No annular structure of the lesions
  • Resemble the lesions from other dermatoses or the ones from tinea corporis (ringworm infection)
  • The lesions might be associated with itchiness
  • The patches might be linear, red and scaly
  • Active border
  • Crusting may appear
  • Most commonly affected areas on the face: cheeks, nose, periorbital area, chin, forehead
  • The onset can be:
    • Sudden onset with quick spreading of the lesions
    • Delayed onset with slow spreading of the lesions (inflammation is minimum, the rash on the skin is reduced)
  • Lesions are frequently aggravated by sun exposure
  • Skin may peel after the treatment is begun
  • Lesions are contagious to the touch.

What are the Causes of Tinea Faciei?

These are the most common causes of tinea faciei:

Fungal infection – zoophilic dermatophytes (Microsporum canis)

  • Acquired infection from pets or livestock
  • Transmission from one person to the other is possible, as the lesions are highly contagious to the touch
  • In Asia – common infections with Trichophyton mentagrophytes and Trichophyton rubrum
  • In North America – common infection with Trichophyton tonsurans.

Diagnosis

These are the most common methods used for the diagnosis of tinea faciei:

Mycological investigation

  • Microscopic examination of the skin
  • Skin cultures (surface scraping)
    • Keratinocytes will dissolve and the fungal elements are going to be exposed
    • The cultures allow for the positive identification of the fungal infectious agent
    • Special media can be used for faster detection of the dermatophytes

Histological examination

  • Used sometimes for the confirmation of the diagnosis
  • Histological modifications resembles the ones from psoriasis
  • Cutaneous fungal elements will be revealed in the epidermis
  • Certain fungal infectious agents might also infect the hair follicle (aspect revealed through histological examination)
  • Infiltratory inflammation might be present in the dermis as well

Differential diagnosis

  • Cutaneous infection with Candida
  • Allergic contact dermatitis
  • Irritant contact dermatitis
  • Perioral dermatitis
  • Seborrheic dermatitis
  • Granuloma
  • Lupus erythematosus (acute/bullous/discoid/drug-induced/sub-acute cutaneous/neonatal)
  • Pityriasis (alba/rosea)
  • Rosacea
  • Sarcoidosis
  • Syphilis.

Treatment

These are the most common courses of treatment undertaken for tinea faciei:

Topical treatment

  • Anti-fungal medication
    • Recommended if the hair follicles are not affected
  • Topical corticosteroids can be recommended to reduce the inflammation and itchiness
  • Ciclopirox/terbinafine
    • Recommended for the anti-inflammatory properties
    • Given as treatment in cases of tinea faciei caused by zoophilic dermatophytes
    • Can reduce the common, yet severe, inflammatory reaction commonly associated with this condition
  • Azoles
    • Topical application as well
    • Have a direct effect on the wall of the fungal cell
    • Reduces the reproduction of the fungal cells
  • Allylamines
    • Leads to the death of fungal cells
    • Topical and systemic administration
  • Isoconazole nitrate in combination with diflucortolone valerate
    • The combination of these two topical preparations has shown promising results in reducing the symptoms of tinea faciei
  • More severe cases can benefit from systemic administration of corticosteroids. However, these should not be administered for prolonged periods of time, as they can have serious consequences on a person’s health and they can cause severe withdrawal symptoms. The treatment with systemic corticosteroids should be reduced gradually, not stopped all of a sudden
    • Systemic therapy is recommended in the following cases:
      • Rare, atypical lesions
      • Chronic cases
      • Multiple lesions.

Home Remedies

These are the most common home remedies recommended for tinea faciei:

Tea tree oil

  • Recommended for tinea faciei because of its anti-fungal and anti-septic properties
  • Topical applications are recommended with the help of a cotton ball
  • Daily repetitions are indicated until the first results become noticeable
  • It is recommended to warm the tea tree oil a little before actually applying it on the skin

Garlic or garlic extract

  • Recommended because of its anti-fungal properties
  • Regular use is indicated for effective results
  • If you decide to use regular garlic, then cut it into slices, apply it directly on the skin and bandage the area
  • The best results are when the garlic is made into a paste, applied on the skin and left there over the night

Apple cider vinegar

  • Natural anti-fungal properties
  • Topical applications are recommended with the help of a cotton ball
  • Daily repetitions are indicated until the first results become noticeable
  • Complete removal of the fungal infectious agent

Coconut oil

  • Natural healing properties
  • Recommended for cases with intense itchiness
  • Overnight applications are most recommended

Jojoba/lavender oil

  • Mix the jojoba oil with the lavender oil
  • Topical applications are recommended with the help of a cotton ball
  • Lavender oil is indicated because of its powerful anti-fungal properties

Mustard seeds

  • Soak them into water and crush them into a paste
  • Direct application on the skin

Turmeric

  • Apply fresh turmeric on the skin with the help of a cotton ball
  • Daily repetition of application

Tinea Faciei Pictures

Collection of photos, images and pictures of the skin infection Tinea Faciei…

tinea faciei

tinea faciei pictures

tinea faciei pictures 2

tinea faciei pictures 3

tinea faciei pictures 4

tinea faciei pictures 5

tinea faciei pictures 6

tinea faciei pictures 7

tinea faciei pictures 8

tinea faciei pictures 9

No responses yet

Tonsillectomy

Feb 18 2016 Published by under Treatments

Tonsillectomy is a surgical procedure in which the tonsils are removed from their fossa. This is one of the most common surgical procedures performed in children and it is often done at the same time with the removal of the adenoids. However, in the past few years, the number of tonsillectomies in children has decreased (compared to several decades ago, when this kind of surgery was the first course of treatment).

The procedure is recommended in the following situations:

  • Acute tonsillitis
    • Especially when the re-occurrence is frequent
    • The frequency standards for tonsillectomy are:
      • Seven or more in a year
      • Five or more per year for two years
      • Three or more per year for three years
  • Symptoms that indicate the need for tonsillectomy include:
    • High fever
    • Cervical adenopathy
    • Result of tonsillar exudate (identification of infectious agent)
    • Strep throat (positive identification of streptococcus)
  • Obstructive sleep apnea
  • Snoring
  • Obstruction of nasal airways
  • Carrier of diphtheria
  • Peritonsillar abscess
  • Chronic tonsilloliths
    • Tonsil stones or calculi
    • Form in the crevices of the tonsils

Tonsillectomy Procedure

tonsillectomyThe procedure performed in the past was known as total or extra capsular tonsillectomy and it involved the dissection of the tonsil from the surrounding fascia. However, this procedure was gradually abandoned, as it led to increased bleeding and pain in the recently operated area. Today, the most common procedure for tonsil removal is the one of blunt dissection, performed with a simple scalpel. Laser removal has also become a popular choice and electrocautery started to be increasingly used in order to control the bleeding. Sutures are used for the ligation and the patients are administered specific medication (thrombin) post-operatively, to help with the blood clotting.

Below, you will find the most common procedures chosen for the removal of tonsils:

Dissection and snare method

  • Forceps and scissors with a snare (wire loops) are used
  • Not the most common method chosen today
  • Procedure requires general anesthesia
  • Complete removal of tonsils
  • Electrocautery is used to control the bleeding
  • Guarantees minimal post-operative bleeding

Electrocautery

  • Uses electrical energy to remove the tonsils
  • May cause damage to the surrounding tissues
  • Increased post-operative discomfort

Radiofrequency ablation

  • Probes are inserted into the tonsils
  • Procedure requires local anesthesia
  • Requires more than one session of treatment
  • Advantages:
    • Reduced post-operative discomfort
    • Easy procedure
    • Immediate return to daily activities
  • Does not completely remove the tonsils
  • Indicated for tonsils that are enlarged
  • Not recommended for chronically inflamed tonsils or recurrent infections

Coblation tonsillectomy

  • Radiofrequency energy is combined with ionized saline solution
  • Complete/partial removal of the tonsils
  • Procedure requires general anesthesia
  • Advantages:
    • Reduced post-operative pain
    • Healing process is faster
    • The post-operative care is reduced
  • Risk of increased post-operative bleeding

Harmonic scalpel

  • Uses ultrasonic energy
  • Simultaneous cutting and coagulation
  • Minimal thermal damage

Thermal welding

  • Uses pure thermal energy
  • Minimal post-operative pain
  • No swelling or bleeding

Carbon dioxide laser

  • Procedure requires local anesthesia
  • Moderate post-operative pain
  • More than one session required
  • High cost of treatment
  • Not recommended in young children or those who suffer from anxiety

Microdebrider

  • Partial removal of the tonsils
  • Less post-operative pain
  • Faster healing process
  • Reduced complications
  • Indicated for enlarged tonsils.

How long does a tonsillectomy take?

The duration of the tonsil removal depends on the type of procedure that is chosen by the surgeon. On average, the procedure can last as little as twenty minutes and it can go as high as one hour. The duration of the procedure might increase if there are any complications or additional care measures that have to be taken.

Tonsillectomy Cost

The cost of the tonsillectomy is directly dependent on several factors, including the geographic area (prices may vary from one location to the other), the facility in which the surgery is performed and even the physician performing the surgery. The overall price depends on the type of surgical procedure that is chosen for the tonsil removal, the anesthesia (local or general) and the additional costs for the medical staff. It is important to understand that, if there are any complications during the procedure and additional care measures are taken, the price for the tonsillectomy will increase. It might be for the best to check out the insurance policy and see the exact coverage you have for this kind of procedure.

If you do not have insurance, then you should expect to pay somewhere from $4000 to $7000 for tonsillectomy. If the procedure is performed in an outpatient setting, then the price might be reduced by $1000-$2000. If you have insurance, then you should expect to pay somewhere around $200-$1000 for the procedure.

What are the Complications of Tonsillectomy?

These are the most common complications of tonsillectomy:

  • Excessive post-operative bleeding
    • The patient might require a blood transfusion to avoid vascular collapse
  • Infection to the site of the operation
    • May be accompanied by fever
    • The fever might appear as a response to the infection but also because of pulmonary complications or as a reaction to the administered anesthetic
    • If the fever lasts for more than a day and the patient presents severe pain in the throat, then the diagnosis of infection is more than certain
    • Rare complication – neck infection (suppurative lymphadenitis)
  • Prolonged post-operative pain and discomfort
  • Permanent change of the voice
  • Nasal regurgitation (in rare cases)
  • In adults, a rare complication is the dislocation of cervical vertebrae (the atlanto-axial joint presents the highest risk for dislocation or even subluxation). This is an increased risk in patients who already suffer from joint hyperlaxity, such as the patients diagnosed with Down’s syndrome.
  • Complications related to anesthesia
  • Pulmonary complications
    • Airway risk
    • Aspiration pneumonia – Blood is aspirated into the lungs
  • Pulmonary edema – Negative pressure pulmonary edema is a common complication in children who have undergone tonsillectomy
  • Edema of the uvula
  • Mandible condyle fracture – Forceful opening of the mouth
  • Injury to the Eustachian tube
  • Temporary tongue edema
  • Damage to the glossopharyngeal nerve
    • During dissection or electrocautery
    • May lead to taste disorder
    • Can heal spontaneously

Side effects

These are the most common side-effects of tonsillectomy:

Post-operative nausea and vomiting

Can be reduced by administering a dose of corticosteroids before the actual surgical procedure

Otalgia

  • Pain felt in the ears

Difficult post-operative swallowing

  • The patient is recommended to drink a lot of fluids, in order to keep the throat hydrated
  • Dehydration occurs most commonly in children who have a hard time swallowing
  • Vomiting can worsen the situation
  • Soft and cold foods are recommended during the post-operative recovery period
  • More severe cases might require intravenous fluids to be administered

Excessive hyperextension of the neck

  • Muscular tension
  • Severe post-operative neck pain

Obstruction of the airways

  • This may happen because of the intubation
  • May be a result of the edema of the surrounding tissues
  • Acute airway obstruction – happens when blood clots accumulate in the hypopharynx
  • Dislodged tonsillar tissue is not fully removed
  • Loose teeth or parts of surgical instruments can block the airways.

Recovery time

The recovery time after tonsillectomy usually takes between ten days and two weeks. The necessary time for recovery can be maintained to the said period of time if there are no complications to the surgery and if the patient follows the recommended post-operative care measures. Proper hydration during the post-operative period guarantees a faster recovery time and taking the necessary amount of rest is also important. Studies have found that the recovery time is faster in children, not only because they heal faster but also because they take the necessary time to recover, as imposed by the parents. Adults, on the other hand, tend to immediately get back to work.

The recovery time varies according to the age:

Children (2-5 years)

  • Recovery time – few days
  • Rest period recommended – seven to ten days

Children (5-12 years)

  • Recovery time – one weeks
  • Solid foods – after two weeks
  • Return to normal activities – after two weeks

Teenagers (12-19 years)

  • Recovery time – two weeks
  • Solid foods – after two weeks
  • Return to normal activities – after two weeks
  • Remember, it takes one year for the lesion to be completely healed

Adults (over 19 years)

  • Recovery time – two weeks
  • Solid foods – after two weeks
  • Return to normal activities – after two or three weeks
  • Remember, it takes one year for the lesion to be completely healed.

No responses yet

Open Heart Surgery

Feb 16 2016 Published by under Treatments

Open heart surgery is a medical procedure in which a large incision is made on the chest and different surgical techniques are applied on the heart muscle, the valves or the arteries supplying blood to the heart. Open heart surgery is also known as traditional and it is often used for more complicated medical problems. One of the most common procedures that can be performed is the bypass grafting of the coronary artery. During this procedure, the surgeon will attach a healthy artery to a blocked coronary artery that commonly supplied the heart with blood. What happens is that the newly attached artery will actually bypass the artery that is blocked and it will bring the much needed supply of blood to the heart.

Coronary artery bypass grafting is the kind of open heart surgery recommended for patients who have been diagnosed with coronary heart disease. In this medical situation, the blood vessels that commonly supply the heart with oxygenated blood are narrowed and they also harden, making it difficult for the blood to pass. Open heart surgery is recommended for a wide range of other medical problems, including when arteries are narrowed because of the excessive atheroma plaque built inside their walls. When this problem arises, blood cannot go through the artery and the patient is at risk to develop a heart attack. Other recommendations for open heart surgery include valve repairs or replacements, repairing heart defects, pacemaker installations and heart transplants.

Procedure

open heart surgeryThe general procedure for open heart surgery is as it follows:

  • General anesthesia is administered to the patient
  • A large incision is made on the central line of the body, in the chest
  • The surgeon will use a retractor for the ribs and also to have better exposure to the area of the heart
  • In order to reduce the potential risks and complications and also for the surgeon to be able to work on the heart, the patient is connected to what is known as a bypass machine. Using this machine, the blood supply to the heart is temporarily cut off and the open heart surgery can be performed.
  • The actual procedure is performed:
    • If the problem is a blocked artery, then a new one will be attached in order bring fresh blood to the heart
  • The cut sternum will be reattached with special wires
    • In elderly patients or in those who have had to go through more than one heart surgery, the sternum will be reattached with the help of small plates made from titanium
  • The initial incision will be stitched and a dressing will be applied to the wound

How long does Open Heart Surgery last?

The duration of the open heart surgery depends on the actual procedure that is being performed. On average, the duration of this kind of surgery is around three or four hours. Besides the actual procedure, at least one hour before and one hour after the surgery will be necessary. The hour before will be used in order to prep the surgical field, administer the anesthesia and other things like that. The hour after the surgery is necessary for post-operative initial care. The duration of the surgery might increase if there are complications with the surgery.

Recovery time

After the surgery, you will be brought down to the intensive care unit. Depending on the hospital in which the open heart surgery was performed, you might be taken to what is known as the cardiac intensive care unit. In general, the patient is moved to a regular hospital room a day after the surgery, provided everything goes well and no further complications arise. If the patient has been intubated, then the breathing tube will be removed as soon as the patient is able to breathe on his own and the vital signs are stable.

The patient has to stay on the hospital somewhere around four to six days. Depending on the procedure, the patient might be even released earlier but it is common sense that the period is prolonged in case of complications or high-risk patients. The patient is going to be released at home and it will take several weeks before the patient does not feel so weak anymore. Small walks are recommended to be taken inside the house during the first weeks of recovery. The amount of physical movement and activity should be increased according to the prescription made by the doctor.

The doctor will also make recommendations when it comes to the other activities that the patient can resume. Driving a car is generally recommended three weeks after the surgery has been performed. Also, there are certain activities that should be performed only after a couple of months from the surgery, such as lifting weights and other strenuous physical activity. This is mainly necessary because the sternum needs time to heal and you don’t want to run the risk of it not healing properly. In general, the recovery time for open heart surgery is of a couple of months and physical therapy is one of the most recommended methods that can guarantee a proper recovery.

What to expect after an Open Heart Surgery?

In the initial period after the surgery, the patient will have a tube (or several) coming from the recently operated area, in order to drain the excessive fluid. The post-operative care measures involve the administration of intravenous fluids in order to prevent dehydration, a catheter for urine and the connection to a machine to monitor the patient’s vital signs. After the patient is moved to a regular hospital room, treatment will be administered in order to prevent blood clots. After the release from the hospital, the recovery period will start at home and the patient will be instructed to take things slowly and not to rush anything.

After the open heart surgery, the doctor will give the patient a set of recommendations that are meant to protect the recently operated area. The patient should have a healthy diet, with plenty of fresh fruits and vegetables. It is recommended that foods with a high salt content, those that are spicy or excessively greasy should be avoided. The patient will be encouraged to perform regular physical exercise (adapted to his or her condition), to quit smoking and drinking alcohol and to take the recommended treatment for the control of the blood pressure and cholesterol.

Cost

The cost of the open heart surgery depends on a lot of factors, including the geographical area, the actual hospital or clinic in which the surgery is performed and the actual surgeon performing the operation. When discussing to your doctor about the open heart surgery, you might want to discover about the additional fees that might arise. There are costs related to the anesthesia that you will have to handle, the fees of the physician and other medical staff. Also, if complications arise during the heart surgery and additional care measures are necessary, the overall cost of the procedure might increase. In such situations, it is for the best to check our insurance policy before the actual procedure and see for certain how much of the actual procedure is covered.

At the moment, the heart transplant is considered as one of the most expensive open heart surgeries, costing on average $800.000. This is a complicated procedure and it carries a lot of risks but these are not the main reasons why this procedure is so expensive. As it turns out, the actual procurement of a healthy heart for the transplant is what adds to the costs.

Risks

These are the most common risks associated with open heart surgery:

  • Infection at the site of the surgery
    • Increased risk for infection is present in overweight patients, those who suffer from diabetes or those who have gone through multiples open heart surgeries
    • The infection can be accompanied by the swelling of the tissues
    • Sepsis can occur because of:
      • Infection of the respiratory tract
      • Infection of the central catheter line
      • Infection at the site of the surgery
      • Urinary catheter infection
      • Viral infection in different parts of the body
      • Requires emergency medical treatment because of the potential life-threatening symptoms
  • Myocardial infarct
    • This may happen because of a blood clot that has detached from its place immediately after the surgery
  • Stroke – may cause temporary or permanent damage
  • Abnormal heart rhythm
    • Arrhythmias
      • Narrow complex tachyarrhythmia
        • Sinus tachycardia
        • Supraventricular tachycardia
        • Junctional ectopic tachycardia
        • Atrial flutter/fibrillation
      • Broad complex tachyarrhythmia
        • Ventricular tachycardia
        • Ventricular fibrillation
      • Bradyarrhythmia
        • Sinus bradycardia
  • Internal organ failure
    • Most commonly – lungs or kidneys
  • Pain in the chest
  • Fever (low grade)
  • If a heart-lung bypass machine was used during the procedure, then the patient might wake up experiencing the following symptoms:
    • Loss of memory
    • Confusion
  • Blood clots
    • These may form in the legs and travel to the lungs, causing serious problems
  • Excessive loss of blood
    • Surgical bleeding
    • Medical bleeding
      • Platelet dysfunction
      • Thrombocytopenia
  • Difficult breathing
  • Allergic reaction to the anesthesia administered during the surgery
  • Brain damage
  • Increased blood pressure
    • Can appear in open heart surgery where the coarctation of the aorta was repaired
    • Pain and fluid over-load can also lead to such medical problems
    • Can lead to heart failure or other acute hemorrhagic complications

Complications

These are the most common complications associated with open heart surgery:

Cardiac tamponade

  • This is a life-threatening complication of the open heart surgery
  • The pericardium, which is the sac that surrounds the heart, fills with blood
  • If that happens, then the heart is unable to function and cardiac arrest might happen

Other cardiac complications include:

  • Mechanical complications
  • Physiologic complications
    • The preload is not adequate
    • The after-load is excessive

Hematologic complications

  • Bleeding
  • Thrombosis
  • Capillary leak syndrome
    • Neonates and infants who have undergone open heart surgery
    • Prolonged cardiopulmonary bypass
    • Circulatory arrest during the procedure

Internal organ complications

  • Pulmonary
    • Chylothorax – milky pleural effusion
    • Pulmonary hypertension – potentially fatal complication in neonates and infants undergoing this kind of procedure
  • Renal
    • Renal dysfunction – reduced urine output
  • Central nervous system (neurologic complications)
    • Seizures (sudden or late onset)
    • Acquired brain injury in neonates with congenital heart disease who have undergone open heart surgery
      • Pre-operative
      • Intra-operative
      • Post-operative

Diaphragmatic palsy

  • Cause – damage to the phrenic nerve
  • May require a second surgical intervention for the surgical plication of the diaphragm

Hyperkalemia

  • May be a sign that the cardiac output is declining
  • Administration of potassium should be immediately stopped and the exact cause that leads to increased levels of potassium should be identified

Hypokalemia

  • Appears as a post-operative complication
  • Especially in patients who were on heart-lung bypass during the open heart surgery
  • It can also appear after diuretics have been administered to the patient

Hypocalcaemia

  • The right amount of calcium is necessary in the body in order to improve the contractility of the heart muscle
  • May be accompanied by decreased levels of magnesium

Metabolic and lactic acidosis

  • Metabolic acidosis
  • Lactic acidosis

Death

  • Increased mortality rates are present in patients who have reached a certain age or those who have suffered for prolonged periods of time of heart disease
  • If the heart has stopped during the procedure, there is a reduced chance for resuscitation to function.

Open Heart Surgery Scar

Given the fact that open heart surgery requires a large incision to be made to the chest, you should take all the necessary measures to protect the incision and make sure that the wound heals properly. Maintaining excellent hygiene is essential, so as to prevent infection and guarantee that you have a clean scar in the end. Avoid soaking the incision in hot water until the wound heals but be sure to take regular showers and keep the area clean. If the scar looks infected, then be sure to contact the doctor and see what treatment options are available.

No responses yet

Laminectomy

Feb 13 2016 Published by under Treatments

Laminectomy is a surgical procedure in which the lamina of the vertebra is removed. The lamina is actually the dorsal part of the vertebra and its main purpose is to cover the spinal canal. This procedure is also known as decompression surgery and it is often recommended for the enlargement of the spinal canal. When successful, the intervention relieves the pressure commonly felt on the spinal cord or nerves. In most of the cases, the pressure is caused by excessive bone growth, having a negative effect on the spinal canal.

The indication for laminectomy is given when other treatments (medication, physical therapy or injections) have failed to provide the desired results. It might also be recommended in case the symptoms caused by the excessive pressure are severe or if there is a sudden worsening of the symptoms. When the spinal canal is narrowed, the patient can experience a wide range of symptoms, including pain, weakness or numbness. These symptoms most commonly affect the limbs, radiating towards the extremities. It is important to understand that laminectomy usually relieves the symptoms of the condition but does not eliminate the actual back pain.

In certain patients, the procedure is recommended because daily activities, such as walking have become difficult or impossible to perform. Laminectomy is also recommended as a procedure for herniated disks but it cannot solve the problem on its own. As a matter of fact, the surgeon will need to remove the back part of the vertebra or the lamina in order to gain access to the actual herniated disk.

Laminectomy Procedure

There are different procedures that can be chosen:

Minimally invasive

  • Tissue preserving surgery
  • Small incisions are made on the skin
  • Back muscles pushed aside (not cut) – more muscle is intact
  • Part of the vertebra next to the lamina is left intact
  • The spinous process is spared

Conventional approach

  • Excision of posterior spinal ligament
  • Excision of spinous process (partial or complete)
  • Open procedure – muscles are cut in order for the other structures to be excised
  • Removal or one or both lamina
  • The bone removal can be performed using a wide range of surgical tools, including drills, rongeurs or lasers

Laminotomy

  • Removal of lamina middle portion
  • Performed as:
    • Conventional open technique or
    • Minimally invasive

Generally speaking, these are the steps that the laminectomy procedure entails:

  • A small or larger incision is made in the back (depending on the area in which the lamina will be removed)
  • The erector spinae muscle are dissected off the lamina
  • The lamina is then removed
  • The nerve roots are now visible
  • If the nerve compression is severe, the surgeon might decide to trim the facet joints
  • The erector spinae muscles are sewn back together
  • The incision is closed and a dressing is applied at the site of the incision
  • The procedure is performed with the patient under general anesthesia
  • May be combined with spinal fusion in case of spinal stenosis diagnosis.

Complications of Laminectomy

These are the most common complications of laminectomy:

  • Excessive post-operative bleeding
    • This is a rare complication
    • No major blood vessels are in the area
  • Infection at the site of the operation
    • Intravenous antibiotics will be administered in order to effectively treat any post-operative infections
  • Injury done to the nerves during the procedure
  • Dural and nerve root damage
    • Cauda equina syndrome
    • Scar tissue formation (intra-dural and extra-dural)
  • Bowel/bladder incontinence
  • Leakage of spinal fluid
    • Breach in the dural sac
    • The recommendation is for the patient to lie down for a day, allowing for the leak to seal on its own
  • The operated level might be unstable after the surgery (this condition is known as segmental instability)
    • Isthmic spondylolisthesis
    • Degenerative spondylolisthesis
    • Spinal fusion surgery might be required as treatment for such problems
  • Complications related to the anesthesia
    • Heart attack
    • Formation of blood clots (thrombophlebitis or deep venous thrombosis)
      • Blood in the large veins of the leg forms blood clots
      • They can travel to the lungs and cause life-threatening symptoms
      • They can cause swelling in the affected leg
      • Pressure stockings can prevent the formation of blood clots
      • Blood-thinning medication can be administered before the procedure in order to prevent blood clots from forming
    • Stroke
    • Pneumonia
    • Pulmonary embolism – this happens when a blood clot formed in the leg travels to the lungs
    • Higher risk in older patients
  • In rare cases, the pain experienced by the patient is worse after the surgery than it previously was

Laminectomy Recovery time

The patient is allowed to get out of the bed a few hours after the surgical intervention has ended. However, the movements of the back should be kept a minimum and certain movements should definitely be avoided during the initial recovery period (such as rotations). The patient is released from the hospital once the vital signs are stable and the critical period has passed.

Provided there are no complications, one can leave the hospital the next day after the surgery. Driving is recommended to be resumed in two weeks but this depends from patient to the other. Certain activities can be resumed in a month but generally, for sports and other kind of strenuous physical activity, it is recommended that the patient waits at least three months. A change in occupation might be recommended in case of severe affectation. Physical therapy can reduce the recovery time and it is recommended that the patient starts a physical therapy program four weeks after the surgery.

With physical therapy and by following the recommended postoperative care advice, you should expect a complete recovery somewhere around four months. Ice applications might help with the reduction of pain and electrical stimulation of the muscles might prevent the muscle atrophy. Massage therapy is recommended to speed up the recovery time, by draining the excessive lymph accumulated in the recently operated area. The patient will become more active with the passing of time.

Laminectomy Video

No responses yet

High Ankle Sprain

Feb 12 2016 Published by under Bone, Joints and Muscle

The high ankle sprain occurs when the high ankle ligaments are torn or damaged and the lower leg and foot rotate externally. It is also known as a syndesmotic sprain, as the high ankle ligaments (located high above the ankle) are also known as syndesmotic ligaments. These connect the tibia to the fibula and they sustain a lot of the pressure in the lower limb that appears when walking or running. If these ligaments are torn or damaged and the leg twists out, then the high ankle sprain occurs. This kind of sprain is less common than the traditional ankle sprain and it accounts for 15% of all the cases of ankle sprains.

Even though the high ankle sprain is less common than the traditional one, it can cause more severe symptoms and the recovery period is considerably longer. Apart from the damage done to the actual ligaments, the interosseous membrane might also be affected by the sprain. Both the severity of the injury and the recovery duration depend on how many structures and tissues were affected by the sprain. This is why it is important to make the diagnosis as soon as possible, so as to guarantee the fastest recovery.

Signs and symptoms of High Ankle Sprain

These are the most common signs and symptoms of the high ankle sprain:

  • The high ankle sprain may appear on its own or alongside a fracture
  • If the high ankle sprain appears as a solitary problem, the patient might be able to bear weight on the affected leg
  • The patient will experience pain just above the ankle
  • The pain is aggravated if the patient tries to rotate the foot outward
  • Walking may be possible but with significant pain
  • High above the ankle, it is possible for swelling and bruising to appear
  • The symptoms can range in severity, according to the number of structures and soft tissues involved in the actual sprain (from mild to moderate and severe).

Actually, there are three grades for the high ankle sprain:

Grade one

  • Mild pain
  • Stretched ligaments
  • Minor tearing
  • Minimal joint pain
  • Walking is difficult

Grade two

  • More intense pain
  • Joint instability
  • Bruising
  • Minor swelling
  • Walking is more difficult

Grade three

  • Most severe type
  • Really intense pain
  • Moderate to severe swelling
  • Extensive bruising
  • Ligaments are 100% ruptured
  • Major joint instability.

Causes of High Ankle Sprain

These are the main causes that can lead to the appearance of high ankle sprain:

  • Rotational injuries
    • Ankle fractures
  • Impact sports
    • Football tackles
    • Falling or being pushed forward
    • Side-to-side running
    • Starting and stopping feet in a repetitive manner
    • Turning while moving
    • Other sports: hockey, wrestling, soccer
  • Mechanism
    • Foot is planted on the ground
    • Foot is then twisted outward (excessively)
    • Bones pull away from each other and the syndesmotic ligaments that connect them are torn
  • Increased risk
    • Severe load on the ankle
    • Excessive dorsiflexion of the foot – toes go beyond their normal range of motion, towards the shin
    • When a person is tangled under another person.

Diagnosis

These are the most common methods used for the diagnosis of the high ankle sprain:

Physical examination

  • Pain above the ankle
  • Tenderness over the deltoid ligament (this occurs in case a fracture accompanies the high ankle sprain)
  • Physical examination is essential in order to determine whether this is a high ankle sprain or a traditional ankle sprain (according to the area in which the pain and tenderness are experienced)
  • Squeeze test – the leg is squeezed just below the knee. If the patient has a high ankle sprain, then the pain will radiate to the high ankle ligament area.
  • External rotation test – the knee is bent and the ankle is placed in a position that it forms a 90 degree angle with the foot. The next step of the test will be to perform an outward rotation of the foot. If pain appears in the high ankle ligaments, then the patient might have a high ankle sprain.
  • Dorsiflexion and compression test – in this test the patient performs the dorsiflexion of the foot. As the same time, the doctor will apply pressure to the internal and external malleolus, observing the exact location of the pain.

Imaging studies

  • X-rays
    • Important to determine the existence of an additional fracture
    • Three views of the ankle will be taken (different plans)
    • Tibia fractures can be accompanied by high ankle sprains
    • Increased space between tibia and fibula suggest injury to the high ankle ligaments
  • MRI
    • Used for the confirmation of the diagnosis
  • CT
    • Used to determine the distance between the tibia and fibula as well.

Treatment

These are the most common courses of treatment undertaken for the high ankle sprain:

  • The treatment recommended for simple high ankle sprains, without additional bone fractures, includes:
    • Leg rest
    • Ice applications – it is recommended that ice packs wrapped in something (to avoid circulatory problems) should be applied to the affected area for a period of twenty minutes. The ice-pack should be reapplied every two or three hours.
    • Leg compression – ACE wrap is recommended for such purposes.
    • Leg elevation – the toes should be in a higher position than the nose.
    • Removal walking boot
  • The RICE technique is generally applied for all high ankle sprains:
    • R – rest
    • I – ice
    • C – compression
    • E – elevation
  • The compression can be enforced with the help of different types of wraps but also with specially-made casts or splints.
  • Surgery
    • Surgery might be indicated for the internal fixation of an unstable ankle
  • H.E.M treatment
    • Increase healthy blood flow to the ankle
    • Eliminate swelling
    • Increase mobility of the ankle
  • Physical therapy
    • Reduce swelling and pain
    • Improve stability of the ankle
    • Improve weight bearing
    • Add strength of the lower leg muscles
    • Prevents muscle atrophy.

Recovery time

The recovery period depends from one patient to the other, the severity of the sprain, the structured affected, the age of the patient and the actual cause that led to the appearance of the sprain in the first place. On average, the mobility in the ankle is improved after a period of six weeks. The hopping test is performed in order to determine whether the patient can resume his or her normal physical activities (for example, those who play professional sport). If the patient is able to hop on that leg fifteen times, then the recovery process is completed and the patient can return to full, regular physical activity.

However, it is important to understand that the recovery period for the high ankle sprain is considerably longer than the one for the traditional sprain. If the sprain has been accompanied by a fracture as well, then the patient will most likely be recommended to wear a protective walk boot for three months or more. Starting physical therapy as soon as possible after the surgery for ankle fixation is essential, especially if you want to recovery period to be reduced. The exercises performed in the physical therapy clinic will help you achieve weight bearing and they will also prevent the muscle atrophy or weakness.

Healing time

The healing time depends on the grade of the high ankle sprain:

Grade one

  • Full ligament healing in approximately six weeks
  • If you are going to play professional sports, it is recommended that you extend that period, in order to strengthen both the tendons and the muscles. By doing that, you will reduce the risk of further similar injuries.

Grade two

  • The healing time in case of moderate high ankle sprain ranges from six to twelve weeks
  • These patients from a complex rehabilitation process

Grade three

  • The healing time in case of severe high ankle sprains, with full ligament rupture, can be about three months and even more, depending on how severe the rupture was
  • The rehabilitation process can extend as far as six months, because the patient will require several physical therapy programs
  • It is very important to follow a complete physical therapy program as soon as the screws have been removed
  • Weight bearing should be avoided during the period in which the ankle is kept stable with the help of screws

No responses yet

Next »

© 2011-2019 MDDK.com - Medical Tips and Advice. All Rights Reserved. Privacy Policy
The health information provided on this web site is for educational purposes only and is not to be used as a substitute for medical advice, diagnosis or treatment.